Warming of the house with mineral wool is an effective measure that will reduce utility bills and create comfortable living conditions in all respects in the rooms. This is a relatively simple event that you can do it yourself. To achieve the desired result when insulating walls with mineral wool, you need to familiarize yourself with the features of this material and how to handle it. After that, it will be easy to make the right choice and realize what was intended.
Reasons to use mineral wool
There are many thermal insulators on the construction market for indoor and outdoor use. However, not all of them differ in the advantages that are inherent in mineral wool.
Private and industrial developers choose this insulation based on their advantages:
- Low thermal conductivity. Compared to polystyrene, it is 2-3 times better, depending on the model. A 10 cm layer of material has similar performance with 30 cm thick wood.
- Elasticity. This quality allows you to install the slabs by surprise, without the use of foam and glue. In addition, there is no need to level the base, since the insulation fills the recesses and is compressed under the bulges.
- Ease. The substance does not have a particular load on the supporting structure. There is no need to put additional stiffeners and strengthen the foundation.
- Immunity to the vagaries of the weather. Thermal insulation does not have freezing and thawing cycles. The insulated wall is immune to temperature fluctuations.
- Fire resistance. The substance does not sustain combustion and blocks the flame, preventing its further spread.
- Vapor permeability. If the walls of the timber structure are insulated from the inside with mineral wool, moisture will be effectively removed from it, regardless of its concentration.
- Easy to install. Insulation of the house outside with mineral wool is easy to do with your own hands. There is no need to purchase expensive professional tools.
- Durability. The material does not rot, it does not start fungus and mold, insects and rodents avoid it. No shrinkage and structural damage.
Mineral wool is produced in the form of rolls and plates, the thickness of which is 50 mm, 100 mm, 150 mm. For central Russia, it is better to use products 10 cm thick.
DIY insulation technology
Mineral wool insulation can be carried out inside and out. The choice depends on the size of the room and the priorities of their owners regarding the comfort and external design of wooden, brick, stone and aerated concrete buildings. The formation of an ideally warm wall involves the implementation of a number of works carried out in a strictly defined sequence. Thermal insulation of a house depends on the quality of insulation of walls, floors, ceilings and window slopes. When planning the insulation of the facade of the house outside with mineral wool, you should remember these nuances.
The technology of insulation of external walls with mineral wool plates involves the following steps:
- Design. It is necessary to determine the method of building insulation, draw up an estimate, calculate the needs of materials and tools.
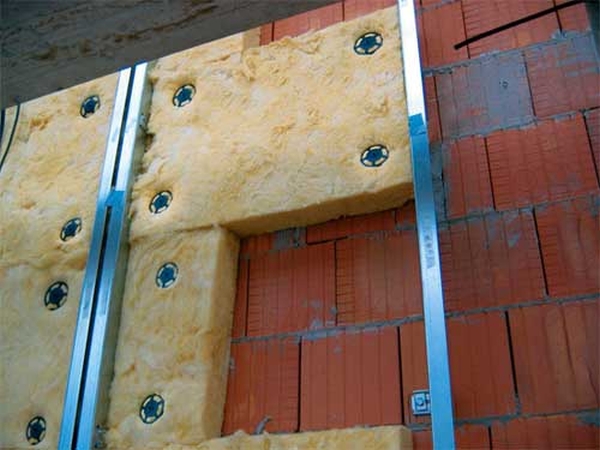
- Conducting training. The canned base must be resistant to moisture, microorganisms, and temperature extremes.Protruding objects are removed from the surface, mold and primer are cleaned, then the base is treated with preservatives.
- Stacking material. The procedure is carried out in accordance with the project. It is necessary to observe all the nuances of the process, since deviations from it lead to a decrease in the efficiency of insulation and a decrease in the service life of the entire structure.
- Technological processes. Mineral insulation is soft and hydrophobic. For its high-quality functioning, vapor barrier and protection against external pressure and humidity are needed. For this, appropriate events are being held.
- Finishing After waterproofing, the coating must be adapted to the surrounding landscape. For this, siding, decking, panels that are most suitable for the environment are selected.
To properly insulate the house, you need to choose good material from trusted manufacturers. You should not focus on the price, as the work is done for a long period. It is impractical to redo everything every few years.
Details on wall insulation with mineral wool
To perform the installation of mineral wool on the external walls of the house, such tools and materials will be required:
- roulette;
- level;
- drill;
- hammer drill;
- hammer;
- putty knife;
- mixer;
- roller or paint brush;
- drywall;
- plaster;
- primer;
- paint;
- mounting grid.
The list can be expanded or shortened depending on the technology chosen.
Wet Facade Technology
This option of warming differs in simplicity of execution and a small construction budget. Plates are attached directly to the walls, the cost of materials is minimal.
The work is carried out in the following sequence:
- Drawing a marking. Marked lines along which plates and points for drilling will be fixed.
- Strengthening the start profile at the basement level. If the placement starts directly from the blind area, a damper tape is attached to it along the width of the insulation.
- The solution is mixed. The choice is made based on the structure of the base. For wood and aerated concrete, a vapor-permeable mixture is taken. Adhesive for ceramic tiles is best suited for concrete.
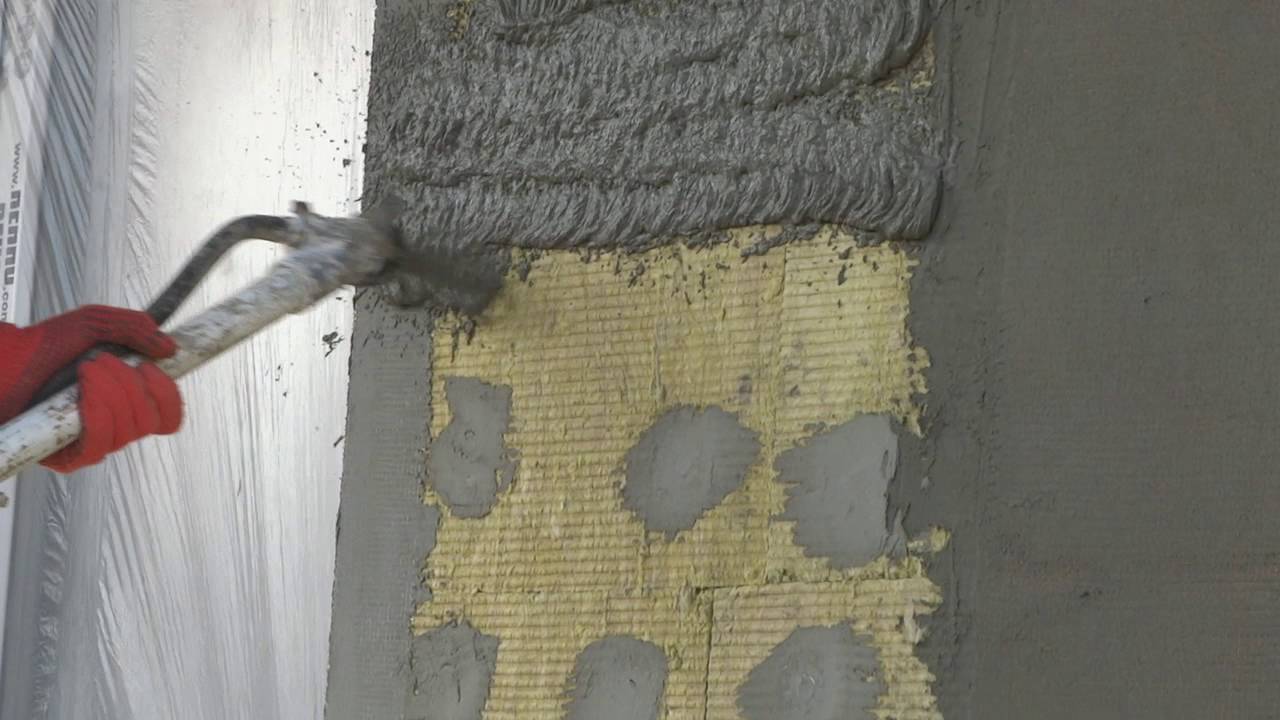
- The solution is applied to the plates. This can be done pointwise or over the entire area with a notched trowel. Fragments are tightly pressed to the base and knocked with a fist.
- Laying is carried out in rows from bottom to top. Each subsequent row is shifted by half the figure. The edges of the plates are also lubricated with glue, after joining, its remains are distributed along the seam.
- The last and corner fragments are cut to size and fill the remaining openings. Corners are reinforced with plastic profiles.
- Plates are rigidly fixed on the base with dowels or self-tapping screws, depending on the base material. This is done at 5 points - in the middle and at the corners.
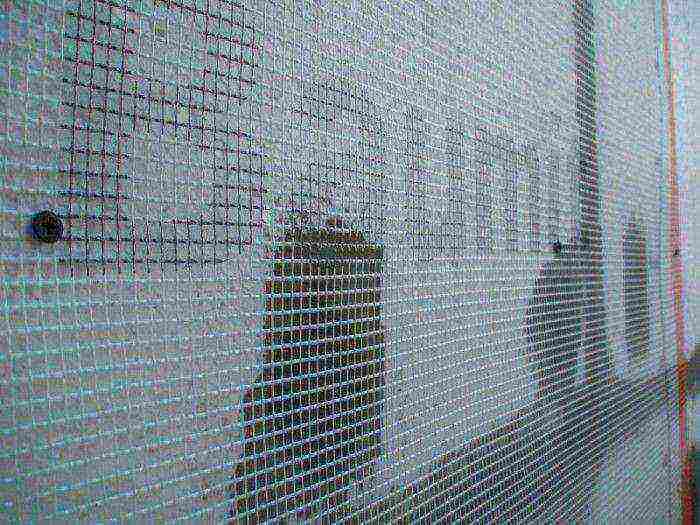
- The surface is pasted over with a mounting grid. The edges of the strips are superimposed on each other by 20 cm. A layer of reinforcing composition up to 3 mm thick is applied over the mesh. The dried surface is treated with a primer.
- Fixing the grill. The best option is a plastic netting. It is fixed pointwise with hot silicone or plastic staples. Putty will hold tight on such a frame.
- A layer of facade plaster is applied. A material that is resistant to temperature extremes and high humidity is selected. The dried coating is treated with antiseptic and impregnation.
The final stage of warming is the surface finish. Paint or varnish is applied to it. If necessary, glitter or beads are added.
Insulation under the panel
This option belongs to the category of collapsible.If necessary, the structure can be dismantled for inspection, repair or improvement.
Installation is carried out in the following sequence:
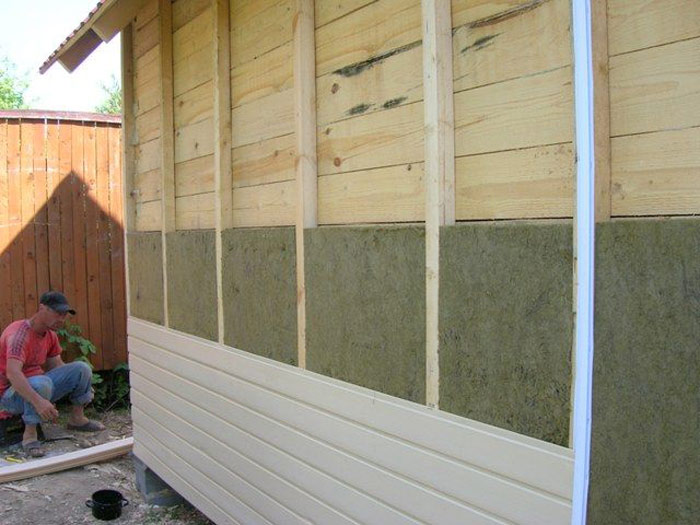
- Making measurements, charting, marking. Preparation of lumber for installation. Boards for the frame are well dried, after which they are treated with an antiseptic, flame retardant and hydrophobic composition.
- A vapor permeable membrane is attached to the wall. Fixing is done with brackets or with instant glue.
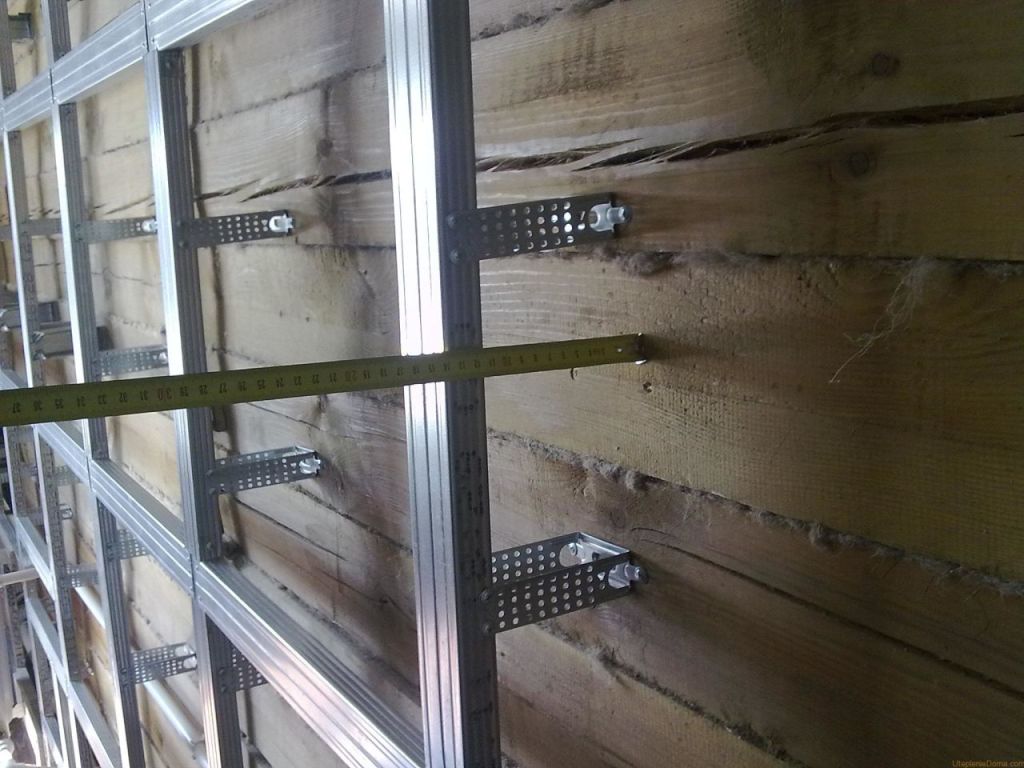
- According to the marking, vertical steel suspensions are fixed on the base.
- Boards are inserted inside the suspensions in a vertical orientation. They are fixed with self-tapping screws. The distance between the boards is taken 3-4 cm less than the width of the plates. The material is elastic and this property must be used when installing it.
- The insulation is inserted into the crate completely. The slab should be pressed vertically, and it is better to glue the joints right away to avoid cracks in the future.
- If laying in 2 layers is carried out, the second is inserted with an offset of half the rectangle.
- An external windproof film is nailed to the frame. When fixing it, you need to make a slit of 1 cm per opening, so that the matter does not tear when the temperature decreases in the cold.
In conclusion, the installation of the finishing cladding is carried out. For this, lining, plastic panels, steel or vinyl siding are used.
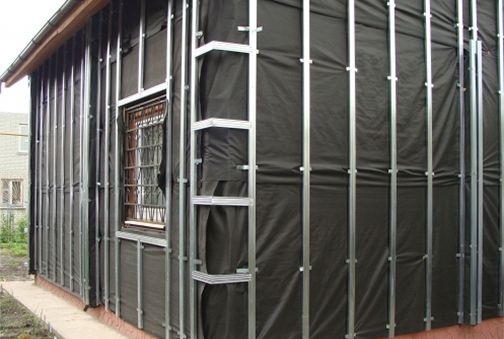
Ventilated facade
Technology is most in demand in the arrangement of buildings whose walls allow air to pass through. Installation of an external design allows you to maintain these qualities, so that a comfortable microclimate is maintained in the rooms.
Construction should be carried out in the following order:
- The base is preparing for conservation. From it dirt, dust is cleaned, foreign objects are removed. After this, surface treatment is carried out with anti-decay, fire and moisture.
- After carrying out measurements and calculations, the starting plate and brackets for vertical and horizontal profiles are screwed to the walls.
- A wooden frame is made from wooden boards or metal profiles. A membrane web is attached to it. Used glue, staples or self-tapping buttons. Care must be taken to ensure proper orientation when installing it.
- Fixing insulation. The plates are inserted into the frame so that there are no gaps between them. To do this, use their elasticity. If you still cannot achieve this, the voids are blown up with foam. After it hardens, the protruding fragments are cut with a knife.
- A windproof film is attached to the outer part of the frame. During installation, you should remember the need for slack of 2 cm per square meter, so that the canvas does not burst from shrinkage in the cold.
- Finishing of the structure is carried out.
Material with sufficient strength to withstand wind and mechanical stress should be selected. A great option is vinyl siding. No less efficiently performs these tasks wall corrugated board. On sale are products in a wide color range that mimics natural and artificial materials.