In suburban and private homes, stove heating equipment is still very popular. With its help, it is possible to heat buildings in areas where electricity and gas are not supplied. The foundation for the stove is the first thing that needs to be done before deciding on the arrangement of such heating.
Types of grounds
There are three types of foundation foundations that are used in the construction of brick stoves:
- concrete continuous casting;
- concrete;
- foundation foundation on stilts.
The classic foundation for the stove in the bath is being built from buta in combination with cement or completely based on concrete pouring. The base itself is made 50-100 mm larger than the dimensions of the stove, measured along the entire perimeter of the structure. In height, it should correspond to the same indicator for the home. On the finished base, two layers of waterproofing are laid on top (roofing material or roofing).
On the top of the frame base is brickwork, in which it is important to provide for special outlets made on the basis of metal corners. These structural elements provide the so-called “fire cutting.” A feature of the pile foundation for the stove is the need to make several supports that are equipped at the same time as preparing the harness for the whole house. On their supporting platforms, a metal frame is then welded, which serves as the basis for the future design.
Pros and cons of each type of foundation
Foundations for stoves in wooden houses have a number of advantages relating to each type individually. The advantages of rubble base include:
- moisture resistance, allowing you to build it in areas with a close location of groundwater;
- strength and reliability, which are based on the natural properties of natural stone;
- long service life (up to 50 years);
- Attractive and aesthetic appearance.
Among the advantages of the bases for a stove in a bath made of natural stone, high environmental cleanliness, frost resistance and resistance to temperature changes are distinguished. But they also have certain disadvantages. Some of them:
- the need to select individual samples of natural stone, which significantly complicates the work and takes a lot of time;
- the permissibility of using only a well-cleaned buta, which in this case is better associated with concrete mortar;
- the complexity of laying due to the significant weight of the stones and the need to work only by hand.
For the construction of the foundation foundation, it will be necessary to prepare a trench up to 2 meters deep, which is associated with a large amount of earthwork.
The pile foundation for the sauna stove has the following advantages:
- high installation speed;
- simplicity of arrangement acceptable even in winter;
- the presence of a ventilated basement;
- quite affordable price.
The disadvantages of this option include the impossibility of deepening into rocky soil, as well as the difficulty of laying it in the vicinity of other buildings. The advantages of continuous concrete foundations for a Russian stove are usually attributed to:
- high strength indicators.
- guaranteed protection against subsidence.
- the relative simplicity of casting a monolithic reinforced concrete slab.
The main disadvantage is the high level of material and labor costs.
Foundation laying calculations
In order to correctly calculate the characteristics of the future foundation foundation, it will be necessary to determine its expected dimensions. The latter depends on the weight of the furnace structure for the sauna and its dimensions. When arranging a standard brick stove, an average weight of not masonry is taken to be about 8 tons, after drying it decreases by about half. In this case, the option is not ruled out when the monolith expands over the area it occupies (for the chimney). This approach to the formation of the base allows you to avoid uneven shrinkage of the two components of the brick structure.
Depth of laying depends on the following factors:
- soil characteristics in a given area (its heaving, for example);
- freezing point characteristic of these places;
- the depth indicator of the foundation of the main building;
- groundwater flow depth.
It is also important to take into account the stage at which the construction of a residential building is at the time of construction of the foundation for a brick stove. On sandy soils, it is laid at a depth of about 80 cm. When the option of heaving unstable soils is calculated, the desired indicator is selected taking into account the freezing point of the soil.
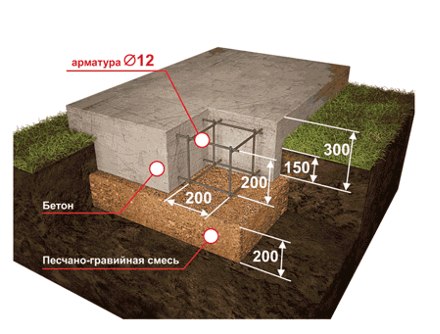
Before starting the foundation, the approximate weight of the brickwork is calculated by the formula:P = 1350 x Vwhere V - construction volume in meters, 1350 - weight 1 m2 in kg (mortar plus masonry of about 200 bricks).
Materials and Tools
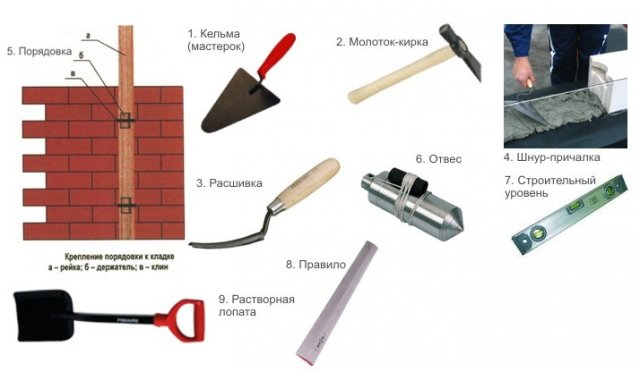
Before starting construction work, first of all, it will be necessary to stock up on a tool selected individually for each stage. For earthwork and carpentry operations, you will need:
- shovel bayonet for the preparation of the pit;
- shovel-scoop for mixing the solution;
- two samples of a sieve: for sieving cement and sand;
- hammer.
It is necessary to prepare a metal trough or other container for mortar, as well as a tape measure, pencil, building level and mounting stapler. From a set of building materials you need:
- boards going to the arrangement of formwork;
- polyethylene for waterproofing;
- sand, dry cement and selected gravel.
To strengthen the foundation, a reinforcing mesh or iron bars will be required.
Construction stages
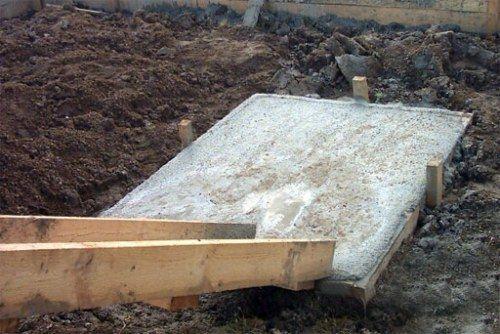
The arrangement of the monolithic foundation for the stove in the bath does not differ from the general sequence of actions for the construction of a standard base. It includes the following steps:
- pit preparation;
- arrangement of formwork;
- concrete pouring.
Work on the construction of various foundations differ in some details.
Under the brick oven
Step-by-step instructions for building a foundation for a brick oven:
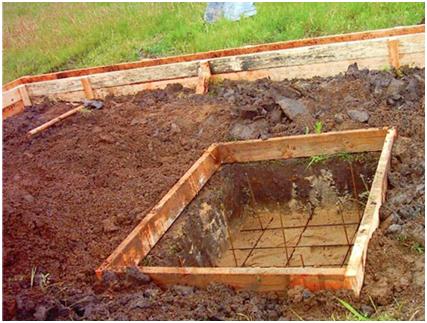
- Trench markings are made and soil is selected to a depth of not less than a meter.
- Crushed stone is poured into it, which is then carefully rammed.
- The bulk layer of the pillow is designed for a thickness of 30 cm.
- A pre-prepared concrete mixture is poured.
The solution is made in a classic proportion: 4 parts of sand are taken on one part of the cement, and then water is added to them in the right amount. At least one day is set aside for it, after which roofing material (waterproofing) is laid on top. It takes about 2-3 weeks to solidify the finished base, during which the surface is periodically moistened.
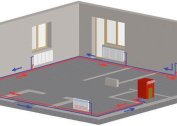
Under the metal furnace
The foundation for a metal furnace in the bath is required only in cases where the weight of the structure exceeds 150 kg. Its use allows you to install the oven strictly horizontally and guarantee its unchanged position. The slightest deviations lead to deformation of structural elements and the deterioration of its characteristics.
The order of operations for the construction of the foundation under the stove:
- Marking is made and a small trench is excavated (with a depth of not more than 0.5 meters).
- A gravel is poured with a thin layer, which is immediately rammed.
- Concrete mix made in the same proportions is poured.
Like the first case, waterproofing is done, the finish layer of which is leveled.
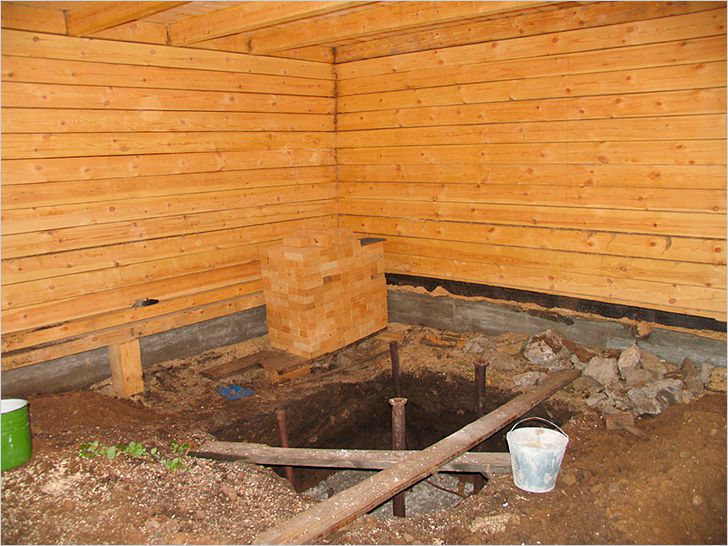
Pile foundation
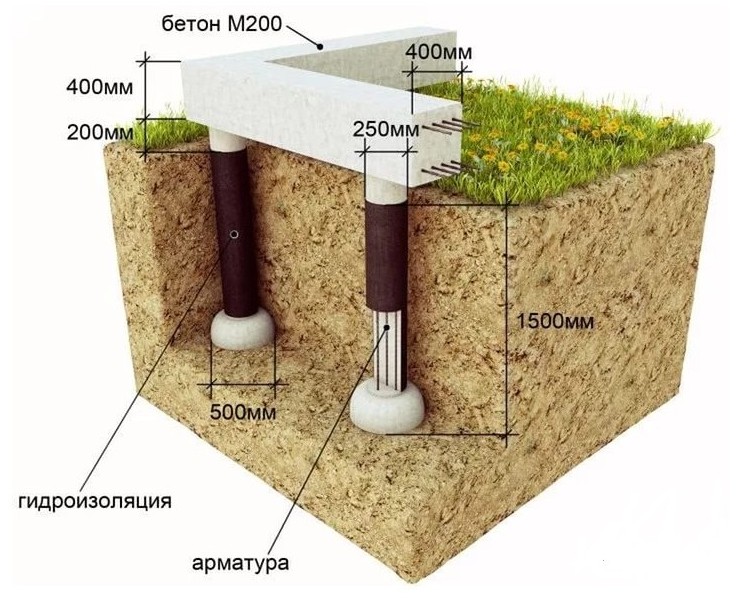
The procedure for arranging the support-pile foundation for brick kilns is somewhat different, since in this case a different technology is used. It consists in the construction of a number of pillars or pile supports on which the frame is subsequently placed under the furnace structure.
Workflow:
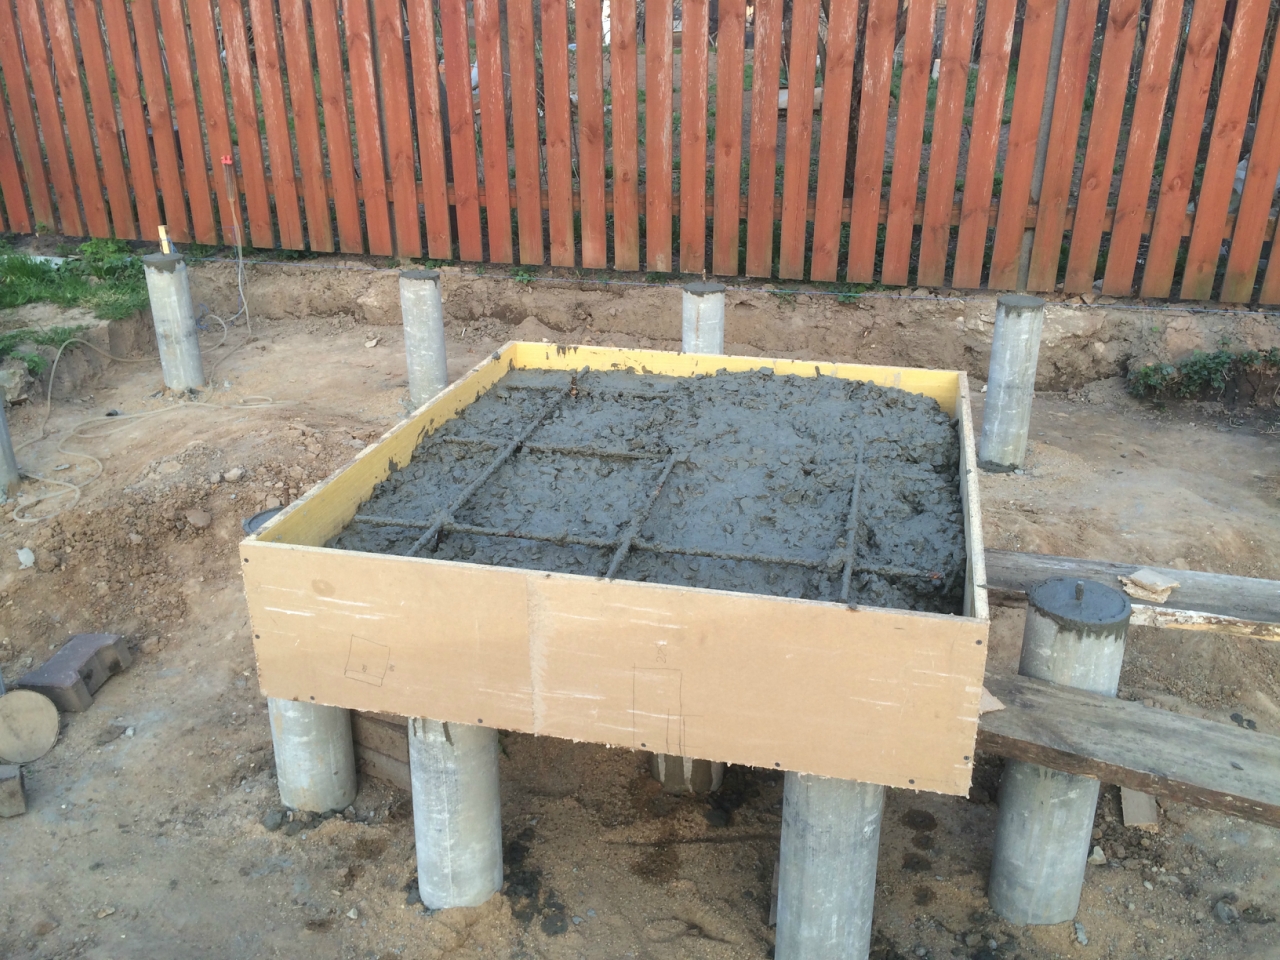
- On the prepared site, markings are made corresponding to the dimensions of the furnace with an inlet of 10 cm on each side.
- With a bayonet spade, approximately 20 cm of soil is removed, after which pegs are hammered along the perimeter with a certain step, between which the twine is stretched.
- Marks are made at the intersections of individual threads, along which pits are then drilled with a depth of about 50 and a diameter of 20 cm.
- Formwork is made from wooden boards in the form of pits, and then installed in them.
- The bottom is covered with a layer of sand with a thickness of 15 cm, which is then carefully compacted.
Upon completion of these procedures, gravel is poured on top and filled with clean water, after which a reinforcing frame is knitted from a reinforcing wire with a diameter of 0.8 mm. Piles are installed at its center, the function of which is performed by asbestos pipes of the appropriate length.
At the final stage of the work, the entire structure located in the pit is poured with concrete mortar, which takes about 2 weeks to shrink and dry. After that, they proceed to pouring the platform under the furnace, based on the finished piles. It also takes approximately 2-3 weeks to dry.
The resulting foundation is very strong and reliable, but a lot of effort and time is spent on its arrangement. Those who want to reduce the time of its preparation to a minimum can use the option of a concrete base.
Concrete foundation
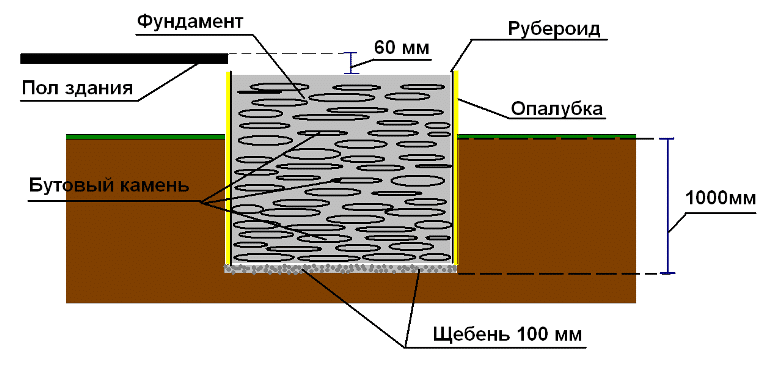
Step-by-step instructions for the construction of a rubble foundation for the stove:
- A trench is marked for pouring the base, the size of which is selected 10 cm larger than the dimensions of the furnace, taking into account the small margin for formwork.
- According to the marking, a pit breaks out, at the bottom of which a pillow is made of selected crushed stone 15 cm thick.
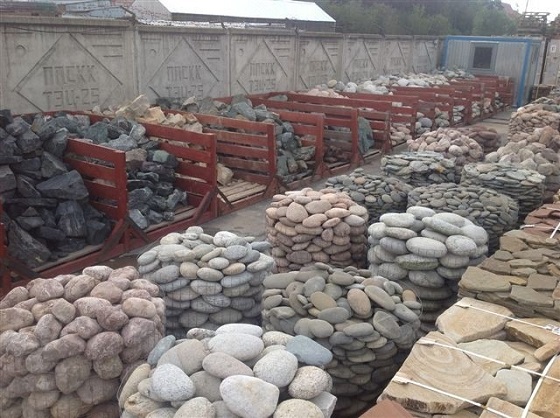
- The resulting layer is carefully rammed, after which several large rubble stones are laid at the very bottom (their diameter should not exceed 15 cm).
- Crushed stone is filled up on top, filling the voids between the stones.
- A cement-sand mortar is poured into the trench to the depth of the layer, in the manufacture of which a classic ratio of 1 to 3 is used. Cement of grade M400 or higher is best suited for its preparation.
After a day, another layer of stones is laid on top of the hardened mass, which are also poured with the same concrete composition. This procedure is repeated until the entire trench is filled with a boot. After that, the construction level is taken and with its help the resulting surface is checked for evenness. The detected irregularities are eliminated using a liquid cement-sand composition. Then the base is covered with plastic wrap and left until completely dry (at least 2 weeks).
In the process of drying, the surface is constantly moistened, and then covered again so that sunlight does not fall on it. At the end of this procedure, the formwork is removed and waterproofing is done, which is traditionally used as molten tar. The voids between the rubble base and the soil are covered with sand mixed with crushed stone.