Replacing a heating system is a complex, responsible, but necessary measure that residents of high-rise buildings and private houses have to deal with. Sooner or later, equipment and communications will wear out, their further operation may lead to emergency situations. If you replace the heating system in the apartment with your own hands, you can save a lot on wage workers. It is only necessary to choose the right material and correctly assemble the structure.
The main disadvantages of heating systems
The standard wiring of heating pipes used in mass construction does not differ in reliability and durability. Defects often begin to appear almost immediately after the building is put into operation.
The main defects of systems made of ferrous metal are as follows:
- Tendency to corrosion. Over time, the walls of the channels are destroyed by rust from the outside and from the inside, which leads to leaks.
- Rough inner surface. Calcium salts and metal oxide settle on it. The inner diameter decreases, the speed of water circulation decreases.
- Lack of intermediate shutoff valves. To get access to the radiator, you have to block the entire riser.
- There are no valves for bleeding air in apartments.
- The presence of numerous threaded joints in which gaskets wear out quickly.
All of these factors indicate that the replacement of heating pipes in the apartment should be carried out as soon as possible in order to avoid unpleasant and dangerous situations.
Pipe specifications
Reliability, durability and efficiency of pipelines directly depends on the material used for assembly.
Modern industry can offer such options for construction:
- Steel. Carbon iron has an affordable price, it is easy to bend, cut and weld. The disadvantage is the tendency to corrosion. In addition, a welding machine and the ability to use it are necessary. Sparks and drops of metal can spoil the interior.
- Galvanizing. It is a zinc-coated pipe made of ferrous metal. The outer layer eventually wears out or lags behind the walls during deformation. Service life is limited.
- Stainless steel. Excellent material for all technical characteristics. It has smooth walls, a presentable appearance, resistant to corrosion and internal deposits. The only drawback is the high cost and complexity of welding.
- Copper. The metal is flexible, strong, durable, does not rust. The disadvantage is the difficulty of soldering, which requires good skills. In addition, non-ferrous metal has a high cost.
- Stainless corrugated pipe. A good option for apartments in multi-storey buildings. The material is durable, not susceptible to rust and deposits. Thanks to its flexibility, there is no need for corner joints. The disadvantage is low strength and the need for regular maintenance of the joints.
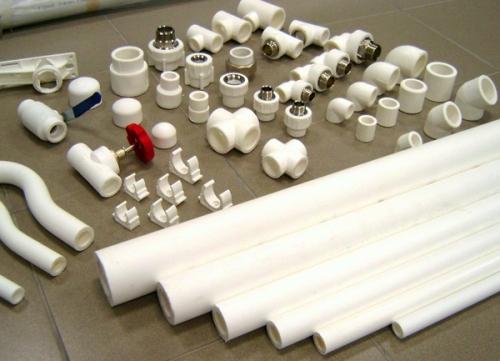
- Polypropylene pipes. Reinforced polypropylene is lightweight, flexible and durable. The system is assembled by soldering, the joints are strong and tight.
- PVC pipes. PVC does not deform when heated, thanks to its flexibility and elasticity it can withstand mechanical stress without consequences.Goes to fittings, does not require additional decoration.
- Pipes with a modified molecular system. Crosslinked polyethylene (PEX) is made by special technology. Modified molecular bonds contribute to the fact that the material becomes strong and resistant to high heat carrier temperature.
When deciding on the choice of material, it is necessary to focus on its quality and the ability to assemble with your own hands. You should not look at the cost, since the system is done for decades.
Dismantling old pipes
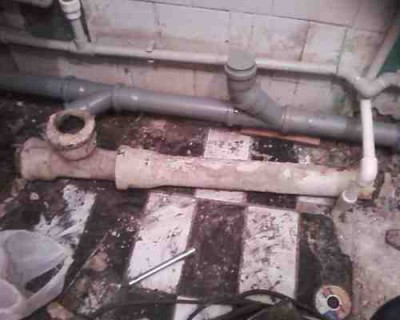
It is better to change the heating system in the warm season, when it is not in demand. It is better to start work in the spring in order to have time to finish it before the onset of cold weather. The initial stage is the dismantling of old pipes.
This procedure is performed in the following sequence:
- Drain the water, make sure that the circuit is completely empty.
- Shut off the feed to prevent accidental flooding due to outside interference.
- Disconnect radiators from supply and return. If the thread does not lend itself, cut off the batteries and soak the joint in a solvent.
- Install supports or suspensions so that the sawn sections do not fall to the floor.
- Cover floors and walls with cardboard, slate sheets or sheet metal to protect against sparks. Cover the interior with cellophane film.
- Mark the piping. The use of old pipes should be foreseen in advance. Based on the plans, dismantling should be carried out.
- Starting from the places of approach to the battery, cut off pipe fragments, following the marked markings.
- First, from below, and then from above to cut the riser.
At the end of the work, you need to clean and strengthen the remaining holes with shells, remove excess property from the premises.
Tools and materials for work
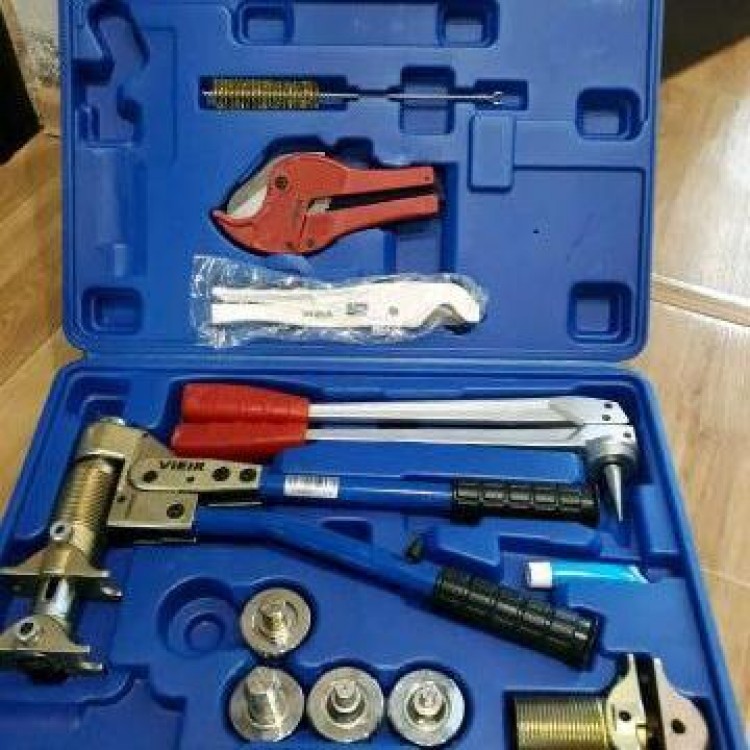
To replace the heating system with your own hands, you will need such tools:
- grinder, rotary hammer, electric drill, screwdriver, soldering iron for plastic;
- pliers, pipe cutter, adjustable wrenches, hammer, pliers,
- radiator key;
- tape measure, level, square, marker;
- ladder.
If you decide to change steel to metal-plastic, you need to purchase the following materials:
- pipes;
- fittings (couplings, cranes, contours, tees, crosses, plugs);
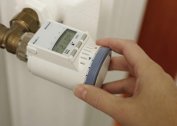
- Mayevsky cranes;
- fastenings with clamps;
- screws with dowels;
- valves for branches from the riser;
- gaskets and brackets for radiators.
We should not forget about security measures. You need to work in a mask, a respirator and protective gloves.
Do-it-yourself installation of heating pipes in an apartment
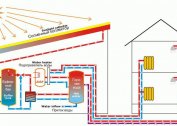
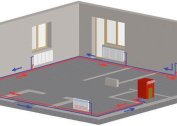
To correctly change the wiring and heating devices, you need to draw up a competent diagram that takes into account all the little things and nuances.
Installation should be carried out in the following sequence:
- Mark the walls, check its compliance with the project.
- Make holes, install fasteners and brackets in them.
- Collect radiators. Equip them with caps and Mayevsky taps.
- Walls in niches for batteries should be cleaned of dirt, primed and glued with foamed polyethylene.
- Hang radiators on brackets. Check their correct position and horizontal position.
- Install the bottom of the riser. Attach a tee or cross to it, depending on the wiring diagram.
- Install a valve to shut off the water supply.
- Solder to the crosspiece another fragment of the riser. Fasten another fitting for the feed pipe at its end.
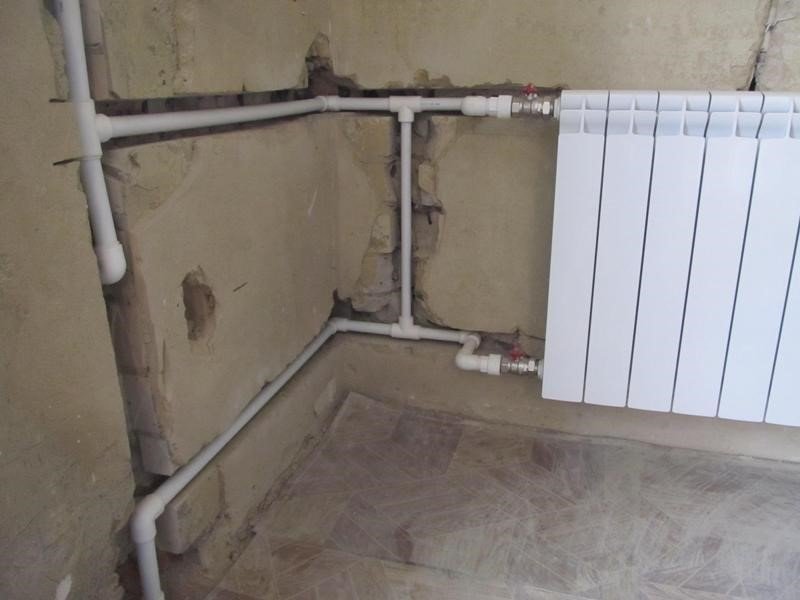
- Starting from the riser, draw horizontal lines connecting the links with couplings.
- Assemble the connections to the radiator, weld fittings with union nuts to their ends. Dock the harness to the batteries.
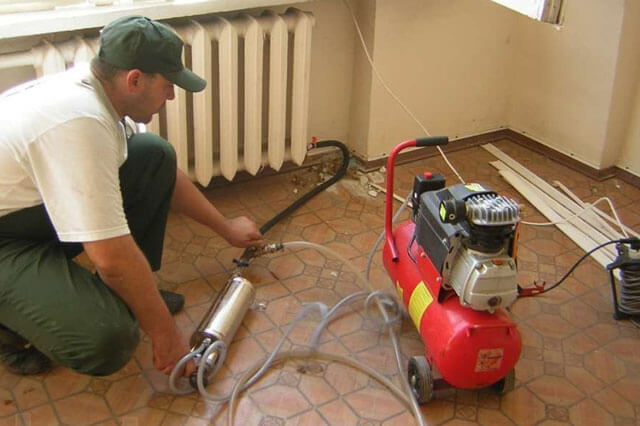
At the final stage, pressure testing is carried out. The purpose of this event is to identify assembly defects.
Common installation errors
Having decided to replace the heating in their home, many people try to save on everything if possible. This is a major mistake, as cheap products will not last long and efficiently.
Most often, wizards make the following mistakes:
- forget to install taps for bleeding air;
- Do not lay protective material under the pipes when welding and cutting them;
- twist and rotate the plastic sections in the fittings during soldering;
- poorly welded pipe joints.
During the installation of heating, attention must be paid to every little thing, as it can cause a failure of the entire system.