Drainages are installed on the protruding plane of the base of the wall at the junction with the base. Their function is to protect the joint from the action of negative factors. Low tides for the basement of the foundation protect from rain, accumulation of snow, ice and strong heat from the sun. Plums decorate the facade and are selected individually for each base, depending on the material.
The need and purpose of ebbs for the base
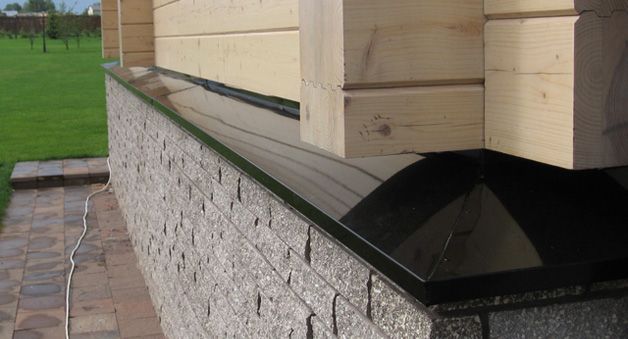
Weather phenomena act on the protruding base and gradually destroy it. The joint between the wall and the support is in the open state, and the water penetrates inward despite the waterproofing layer. The wall receives a portion of moisture and transfers it inside the room. The drainage for the base in the form of a narrow shelf protects against moisture and does not allow moisture to pass into the joint.
On the protruding part, water accumulates, which freezes in winter. The ice expands and cracks appear on the horizontal surface. Gaps widen over time and the base needs repair. Water leaches sand from the solution, weakening the strength of concrete. Drain removes moisture from the plane, protecting the base from deformation.
If the remote base is made by siding, plastic or corrugated board on a three-dimensional frame, drainage for the base is indispensable. The top surface of the structure must be reliably insulated from moisture, as this will weaken the fastenings of the elements. The hinged finish will peel off and fall over time, which will add extra costs.
The cost of installing a drain strip will pay off in a short period due to the lack of need for repair of the base and its decoration.
Selection rules
 The outflow of the base is made of different materials, its cost depends on this. The price is affected by the configuration of the drain strip, as an increase in the number of bends leads to a rise in the cost of production. Along with the ebb, ready-made joints of internal, external corners, elements of turns, transitions are acquired. Such connections can be made directly on the spot and thereby reduce the cost of acquisition.
The approximate cost of drainage per 1 meter:
- plastic costs 80 - 500 rubles;
- galvanization - 60 - 450 rubles;
- aluminum strip - 300 - 900 rubles;
- concrete framing - from 150 rubles;
- clinker protection - from 1900 rubles and higher;
- copper - 1200 - 8000 rubles;
- sandstone and a similar stone - from 500 rubles and above.
The material is selected depending on the facade, so as not to disturb the overall appearance. For example, spillways made of plastic or PVC will not look on the basis of natural stone; here it is better to put elements from clinker or copper. On a remote frame from a profiled sheet it is impossible to install a water ejector from natural stone or sandstone, plastic or galvanizing is better.
The cost of installing the tides ranges from 150 to 650 rubles per linear meter, depending on complexity. You can do it yourself, but skilled workers know exactly how to connect the ebbs to each other qualitatively and without gaps.
Ebb material

Metal base castings are made of stainless steel, galvanized. Variants are used which, when manufactured, receive a protective layer of powder or polymer color. Such products have the necessary qualities and are inexpensive, so ordinary developers use them more often than other types.
PVC material is durable, silent.In colored plastic, coloring components are introduced during the manufacturing process, so it does not fade in the sun.
Aluminum is resistant to frost, has been used for a long time in regions with high humidity. The material belongs to the pure species and when heated by the sun does not emit harmful components into the air.
Copper plums work ideally as protection, but the owners are frightened by their high cost.
Concrete protection of the base is cheap and reliable, but technology with intermediate impregnation is required to comply with the material brand M450 firmly adheres to the surface.
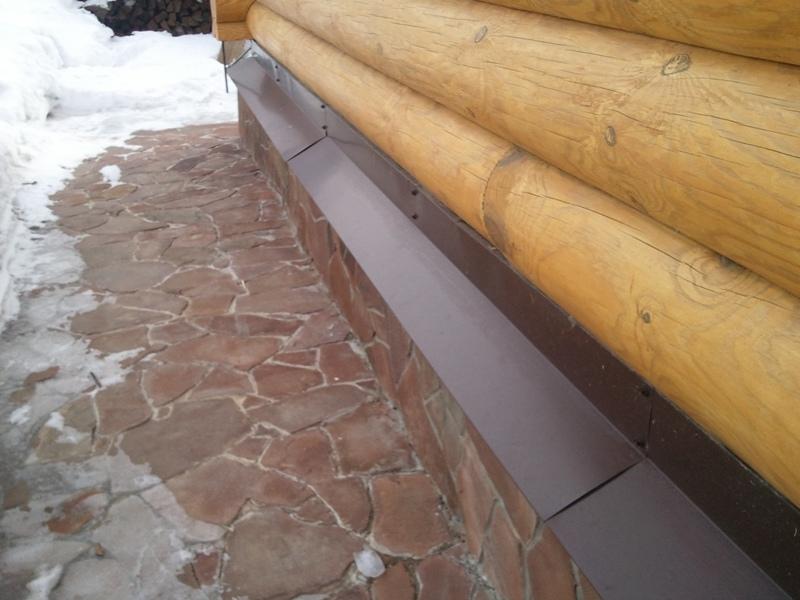
Wooden ebbs for the foundation are put on the bases of frame structures, timber houses, they are treated with water repellents.
A natural stone or tile is put with an imitation of the texture of a natural analogue. Granite, travertine, marble, syenite are used. Outflow from such material is expensive, it is used for expensive facade decoration. The material is resistant to moisture, high and low temperature drops, is not destroyed by shock. Natural stone has a large mass, which should be considered when choosing the type of drain.
Artificial tiles have an affordable price, less weight, so they are used more often. Clinker tiles can be mounted on a cement-sand mortar or use special adhesive mixtures for this. Manufacturers produce angular, docking elements made of artificial stone, which facilitates the laying of such a drain in the installation position.
Features and decorative qualities
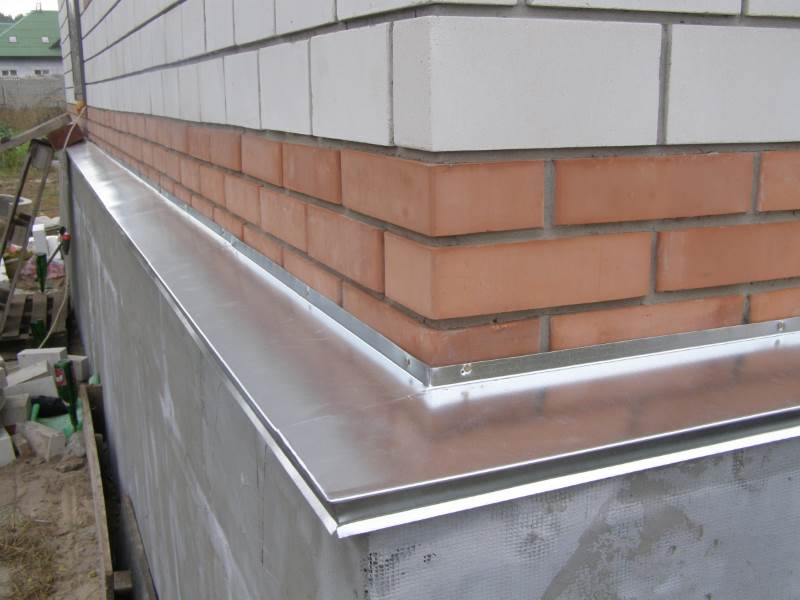
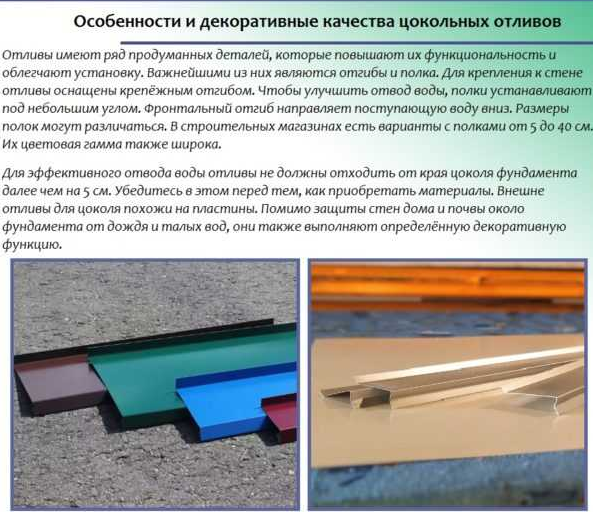 Drains for the foundation differ in the shape of the bend, but they all have a plane with which they are attached to the wall of the building. The width of the moisture ejector should be no less than 5 centimeters wider than the horizontal plane so that the water does not flow down the plumb wall of the basement and falls onto the blind area.
There are structural elements in the drain structure;
- shelf at an angle for draining moisture;
- mounting bend installed close to a vertical surface;
- frontal plane for the direction of water flow.
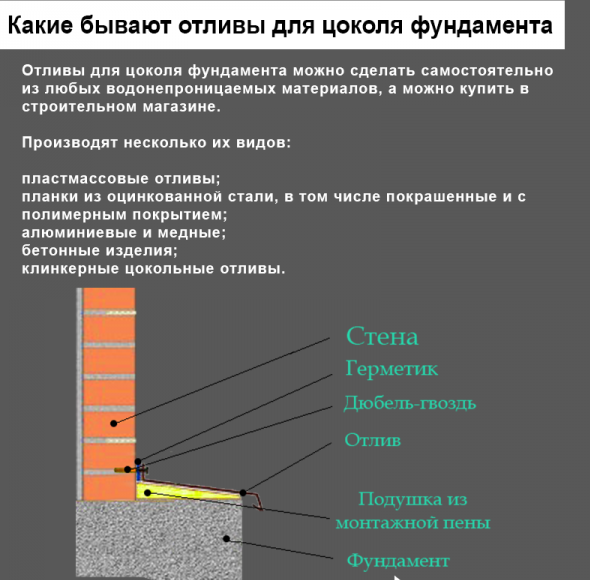
The front bend of the horizontal plane is set slightly at an angle so that moisture drains freely under the action of gravity. Often in the wall above the ebb the grinder cuts a gap, then the ebb on the base receives another element in the form of a horizontal shelf, which enters the body of the wall.
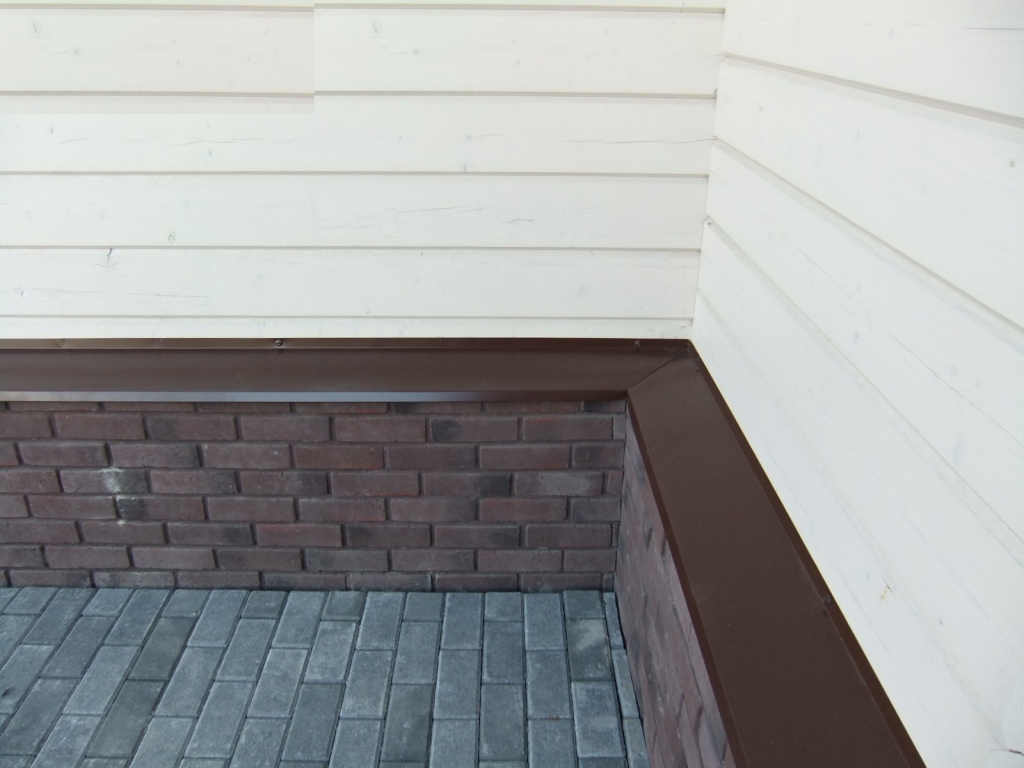
Drainage is taken into account in the decoration of the facade, because the strip is clearly visible against the background of the front trim. The color of the tide is chosen to match the wall or contrast is adopted, it depends on the designer and the wishes of the owner.
At home, the base metal casting is done with a wooden hammer and a metal corner. Sometimes the owner has a bending machine for the manufacture of strips of galvanized steel and stainless steel. Coated ebbs are best purchased at the store.
Mounting technology
 You can independently mount the ebb to the brick wall without any difficulties, but you need to follow certain steps. Protective drainage systems are mounted after finishing the foundation, but before the facade is decorated.
Before the device check the horizontality of the butt line between the protruding foundation and the wall. Use a building or laser level. The line should be straight, not protruding or sagging in separate sections, so that the ebbs on the foundation fit firmly to the vertical plane. If this happens, the distortions are aligned in various ways.
The lace is pulled on the installation line. The tides are mounted directly to the wall or a guide element is mounted first. Drainage is fixed to the bar with self-tapping screws, and is nailed to the wall with metal dowels. The strips are placed with an overlap of 3 centimeters, the joints are filled with sealant for outdoor use.
Supporting brackets are made for large-width drains (from 8 to 10 cm) to reduce spillway shear during strong winds.Sometimes a longitudinal block of wood is placed or the drain rests on a mounting foam.
Installation Schemes
The width of the tide is determined after the design of the cap, because trim can push the front of the base forward. The angle of inclination of the frontal plane is taken 10 - 15 °, so the tape measure is applied to the wall at the appropriate height and measured to the edge of the horizontal surface, taking into account the offset.
The length is calculated along the perimeter of the mount, while the measurement is carried out along the outer edge of the intended tide. The resulting length is multiplied by a factor of 1.1, to take into account the trimming of corner joints and overlapping joints.
Installation Order:
- installation begins from the first corner of the structure;
- the second is mounted profile on the next corner;
- then the elements are connected using a straight section;
- then the ebb is mounted on the third angle, connected to the second installation of the ebb in a straight section and so on.
Low tides are connected by soldering into the castle. The second method is used for metal drains that are bent at the installation site. Soldering is rarely used, as violates the outer protective layer of the profile.
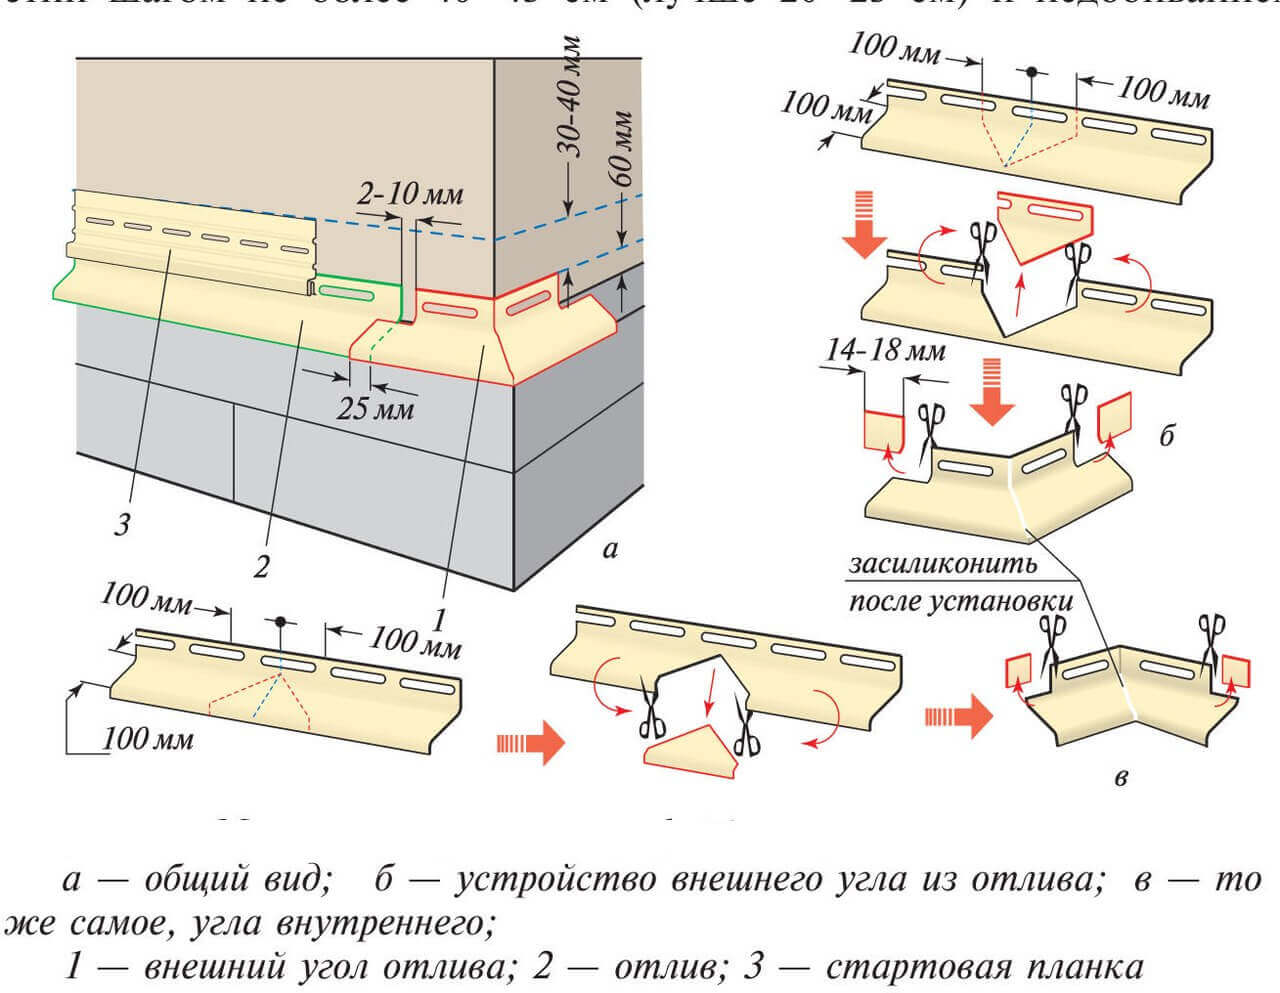
Outside corner
The outer turn joint is made from the main strip, the connection line is smeared with sealant. A support element is placed under them so that the corner joints do not walk vertically.
Ways to make the outer corner:
- Their two straight lines. Straight sections are selected, the end of one is cut at an angle of 45 °. For marking, a miter box is used or a special template is made. The end face of the second piece is similarly cut, but an allowance of 20 mm is made along the length. The allowance remains inside the joint, and the stripes on the corner are fixed with rivets to each other.
- From one straight profile. An angle of 90 ° is marked on the straight section so that its apex is on the lower shelf, and an allowance of 20 mm is given on the plane. The drain is cut according to the marking without entering the lower shelf. The casting profile is bent so that the parts form a right angle, and the tolerance is at the bottom of the joint. Parts are joined by soldering or riveting.
The joint is not always beautiful, therefore, a decorative strip from the profile is used. The width of the element varies between 4 - 8 cm, is fixed with screws or rivets.
Inside corner
The principle of joining the ebbs at the corners inside the protective finish is similar to the connection of the outer corner, but it has some differences. Each line in such a place gets off individually before profiles are placed on direct plots.
Execution of the internal joint:
- From two straight sections. The ends of the straight stripes are formed at an angle of 45 °, as when performing an external angle, but in the opposite direction. The second piece is cut 20 mm longer than the required size; when connected, this outlet extends from the bottom of the connection.
- From one profile. An angle of 90 ° is marked on a straight piece, but the top of the corner is not on the bottom, but on the top shelf. Further, the manufacturing technology of the inner and outer corners is no different.
To support a wide internal joint, support bars are used on which the profile is placed. On the wooden girders, an internal joint is also formed so that the ebb is firmly applied to them without gaps.
Straight junction
Lap profiles are connected or a lock is made. In the first method, rivets are placed for strength. Such a connection has the advantage that during thermal expansion there will be no ebb deformation due to shear. The sealant between the connecting sections plays the role of a thermal joint. The lap joint method is simple and is used in the case of installing drainage systems for the base with a large front of work.
The lock option requires a lot of labor, but is reliable and durable. Such a compound does not allow water to pass through, even if the joint is not treated with silicone.
The types of gearing used are:
- single lying;
- single standing;
- double recumbent;
- double standing.
A decorative plank is placed when overlapping, when joining a castle, it is rarely used. Such inserts increase the cost of mounting the base.
The main nuances of installing base ebbs
After installation, the rigidity of fastening of all elements is checked. To do this, press on the ebb with your hand, it should not bend. During installation, not only the joint of the profile is sealed, but also the line of attachment to the wall.
Silicone is used to seal the cut-out slots in the wall, if the upper shelf was embedded directly in the vertical fence. You can use bituminous mastic or special compounds for sealing external compounds. A noise-absorbing tape is placed under the metal tides to reduce the sound from raindrops
Clinker drains are installed first on the inner and outer corners, then rectangular sections are formed. If there are no factory corner elements, joining is done by cutting the tiles in place at 45 °.