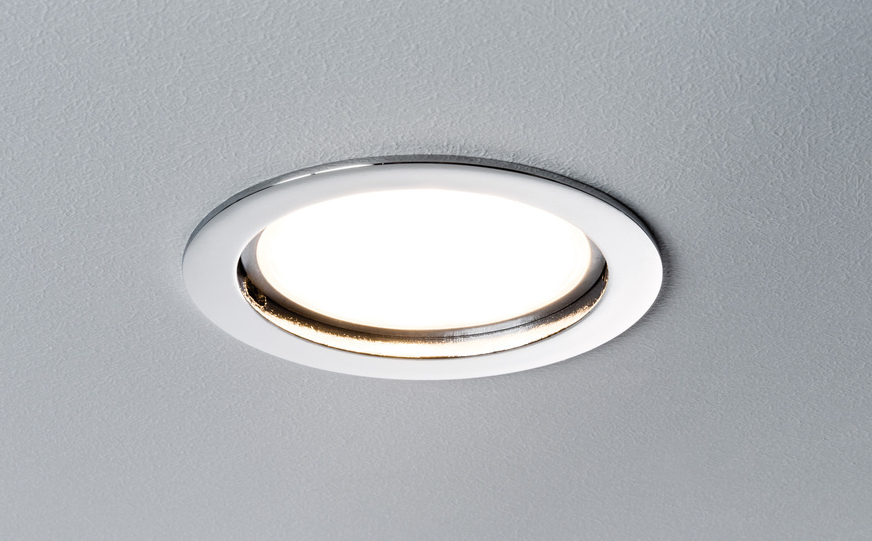
The installation of spotlights is suitable for creating basic lighting and additional local illumination. Due to the variety of cartridge designs for installation, bulbs with different types of socles can be used. The design of the devices is quite simple, so even a novice in electrical work can figure out how to connect the spotlights and properly connect them to the home network.
Instrument Design and Varieties
Most often, the connection of spotlights is performed in a suspended or laid on ceiling structure containing some space between the rough and the final surface. In these voids are the backs of devices, as well as wiring and other elements responsible for power supply. It is undesirable to place such lamps in the bathroom and other rooms with high humidity. One or more appliances can be installed in a cabinet to create a backlight.
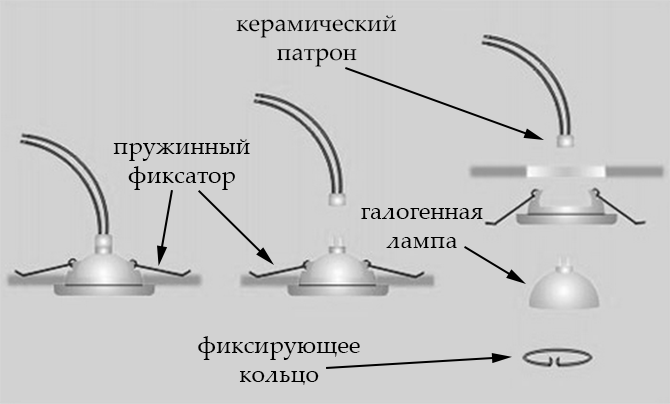
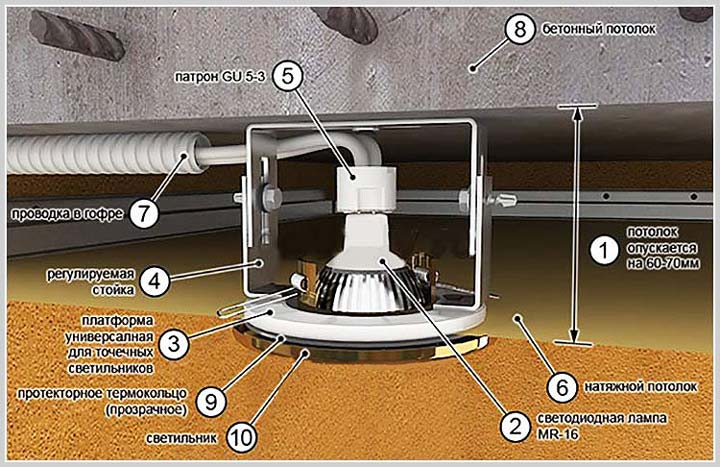
Each individual lamp includes the following elements:
- Reflective device with the ability to set the direction of light flow.
- Lamp. Different types of bulbs are used - with halogen gas, LEDs, and fluorescent ones.
- Housing with fasteners (spring mechanism and tabs).
- Outdoor panel limiting the area. It can have a variety of designer designs, colors, shapes (star, flower, etc.), can be made of various materials - wood, plastic, metal.
By the method of installation, fixtures can be divided into two categories. The former are usually embedded in pre-arranged recesses, the latter are mounted on the surface itself using special clamps. The latter option is large in size, it will not work for a small room.
The performance of the device is also affected by the type of lamp used. Halogen options are distinguished by a long service life, brightness and naturalness of lighting, environmental safety. But they also have disadvantages: high energy consumption and insufficient resistance to surges in mains voltage. Much more economical devices with LEDs and fluorescent lamps. When using the latter, it is necessary to handle the flask very carefully, since it contains a certain amount of mercury compounds. One should be no less careful with halogens: they should not be touched with their hands at all.
LED lamps have the highest price of all types. But they serve for a long time and well tolerate power surges up to 60 V. On sale you can find light bulbs with white light and warm yellowish.
Mounting Materials
Before starting to equip niches and then connect fixtures to the network, the master needs to make sure that he has the necessary materials and tools. Need to buy:
- cables
- light switch,
- insulating tape with heat shrink properties,
- clamping pads and sleeves for mounting wires.
The required number of fixtures and bulbs for them should be prepared.
The most important criteria for selecting a wire is its non-burning and resistance to high-temperature environments. The RKGM copper wire equipped with a double insulating coating is well suited: the upper layer is made of fiberglass material, the lower one is made of rubber.Due to heat resistance and incombustibility, such a cable can be installed even in a bathhouse.
Installation requirements
Intending to establish a system of spotlights, great importance should be given to compliance with fire safety requirements. This is due to the peculiarities of ceiling structures, where devices are most often connected: often these are hinged systems, the elements of which are made of combustible materials - PVC, plastic panels, sheet panels containing MDF.
Of great importance are the reliability of the wiring and cable connections, the temperature of the heating of the lamps. The latter is determined by their type: to achieve the same degree of illumination, an LED element must have less power than a halogen. If halogen elements or traditional light bulbs with a tungsten filament were chosen, it is necessary to carefully select the type of wire, avoiding combustible options.
To keep the space around the cables less warm, it is recommended to mount reflective elements and thermal rings.
Failure to comply with fire safety regulations may result in damage to the insulation layer of the wires and short circuit.
Connection schemes for 220 V
There are point devices with an operating voltage of 12 and 220 V. For the operation of devices of the first type, a step-down transformer will be required. From the point of view of safety, these devices are somewhat more advantageous, but rated at 220 V are easier to connect. There are several options for connecting them to a home electrical network.
Serial connection
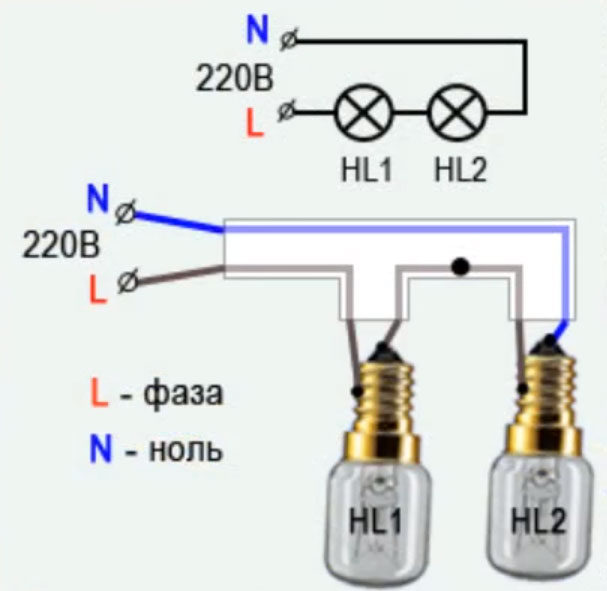
The serial connection diagram of the fixtures is very simple and is implemented even by a master with minimal experience. However, when it is implemented, there is a possibility of interruptions in the operation of the system, and if one lighting device fails, the circuit will break and the remaining lamps will also stop working. Connecting the spots to the electrical wiring here is implemented sequentially one after another. It is recommended to make the chain small, no more than 5-6 elements.
To restore the operation of the chain, it will be necessary to disassemble it and test the operation of all spots in turn. The phase from one device is supplied to the next, and zero is connected to the last. Pre-phase wire is sent to the switch. To install a triple wiring structure, ground is applied to the respective terminals of each element. You can organize it through a light switch or a socket.
Parallel Connection Diagrams
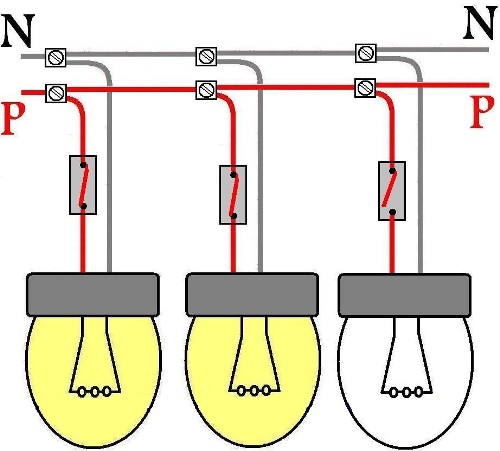
This version of the connection scheme for ceiling lights is more difficult to implement. Moreover, the larger the number of spots connected, the larger will be the cost of time and financial resources. But this method ensures the operation of the devices with the force declared by the manufacturer, in addition, if one of them loses its functionality, the remaining lamps will continue to work. Due to this, this method does not lose popularity.
At daisy chain from the distribution box, the wire extends to the first device. A fragment of the second cable is connected to the output of the lamp at one end and to the next element at the other. Such operations are repeated for each element. All devices will work from one switch. If you decide to make zoning and divide the lamps into two blocks, you need to connect through a switch with two buttons.
At beam connection Each device requires its own cable, so the circuit is the most difficult to implement. From the distribution box, the wire is pulled to the center of the room, fix it and a separate length is stretched to each device.
Connecting 12V spotlights
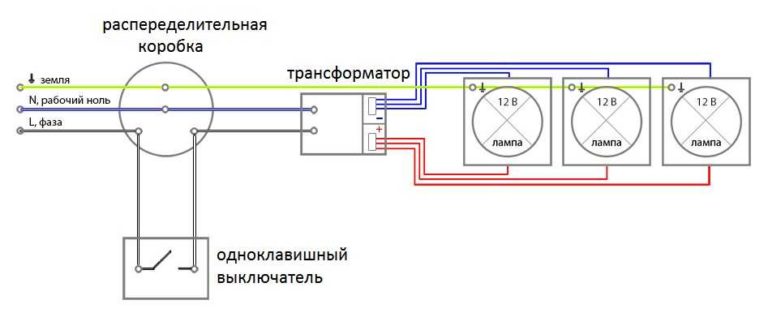
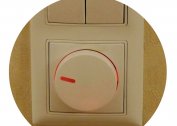
The electrical circuits have an identical appearance, but the wire from the switch leads to the converter, and from its output terminals to the bulbs. When using a large number of lighting devices, a two-key switch and a pair of transformers are used. Then the circuit has a view branched into two lines. For smooth control of the degree of illumination, it is recommended to use a dimmer switch with a button or a rounded handle.
Transformer / Transformer Power Selection
For the smooth operation of the fixtures, it is required that the power of the device is 12-20% higher than the total indicator of the devices connected to it. If you need to purchase a step-down transformer apparatus to connect 6 point lighting elements with 40-watt incandescent bulbs to it, the optimal power indicator for it will be (6 * 40) * 1.2 = 288 W (in practice - 280).
To connect a large number of light sources, high-power transformers with large dimensions are required. It is often difficult to find the best place to place such a device in a room. You can divide the sources into two groups and connect a suitable power unit to each.
Mounting Features
The sequence and set of operations for different types of ceiling structures will be slightly different.
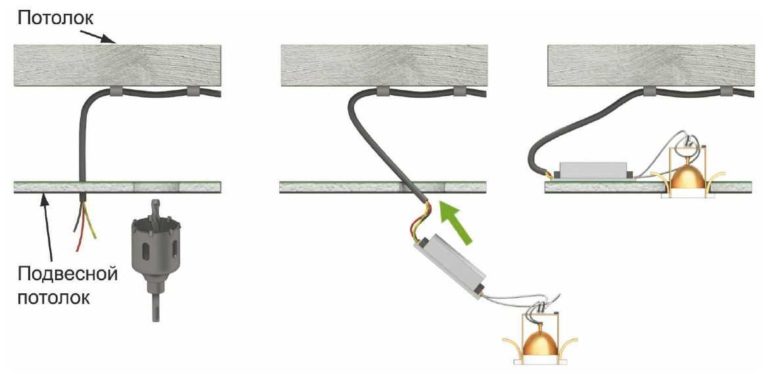
In stretch ceilings
Cable wiring is mounted in advance, fixing them on the ceiling, but not connecting to power. Install pendant lighting devices. Then they connect the cables to them and check the correct functioning. Before arranging the tensile structure, turn off the power, dismantle the bulbs and components that can suffer from high-temperature environments. At the end of the work, holes are cut in the ceiling, ring-seals are put in, and instruments are assembled.
Drywall ceilings
It is advisable to mark the position of future fixtures on the surface and then prepare the niches with a drill equipped with a crown of a suitable size. When cutting the wire, you can leave a spare length of up to 20 cm, adjusted for position offsets. But do not forget that the cables are attached to the base ceiling surface. They should stick out above the drywall level by 6-10 cm, and cutting the extra length is easier than adding the missing one.
Installation Steps
To obtain a reliable design, you must adhere to the proper sequence of work.
Location of spotlights
At this stage, a sketch is prepared indicating the points of placement of spots and the distances between them. From the device to the wall should be at least 0.6 m, to another lamp - 1 m or more.
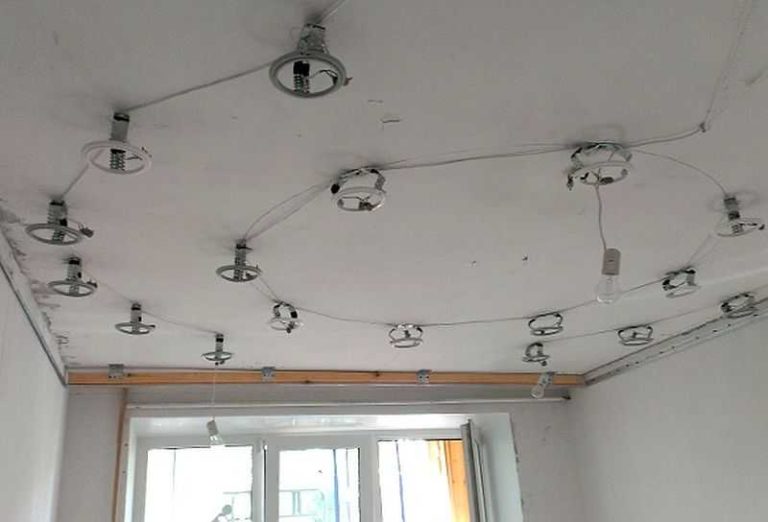
Wire routing
It is better to do this before installing the tension coating. After installing the frame, on which it is planned to mount the sheets, the phase and neutral conductors are placed, focusing on the selected circuit and the location of the spots. Switching is carried out using sleeves and crimping press.
Hole preparation
A drill and a crown suitable for the ceiling material and hole size are used. In the absence of a crown, the boundaries of the holes are marked with a pencil and cut with a clerical knife.
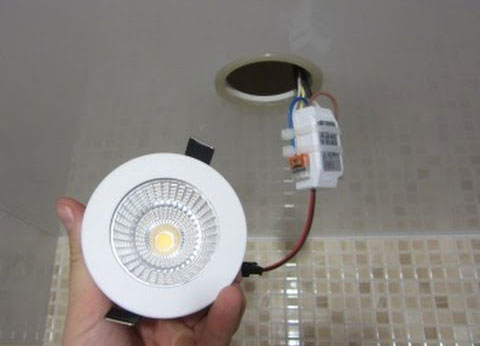
Connection of spotlights
It is produced with a de-energized network. The easiest way is if the devices are equipped with default wiring. Otherwise, loosen the terminal clamps, twist the ends with your hands and press them with pliers.
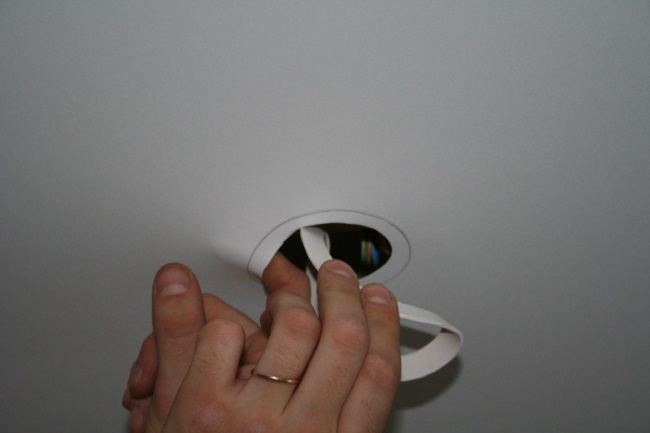
Fastening
Typically, the spots are attached by a pair of side brackets, which are folded up to the stop and placed in the ceiling hole. They must not come in contact with power cables.
The main wire is connected to the switch and the distribution box. Turning on the power, check the performance of the lamps.