Armstrong luminaires are famous for their wide range of applications, ease of installation and luminous flux parameters. LEDs pushed the leading market player - fluorescent lamps - and continue to strengthen their position. Thanks to the development of technology, the installation of such lighting devices will not become a problem, and design features allow you to repair yourself.
What are Armstrong lamps
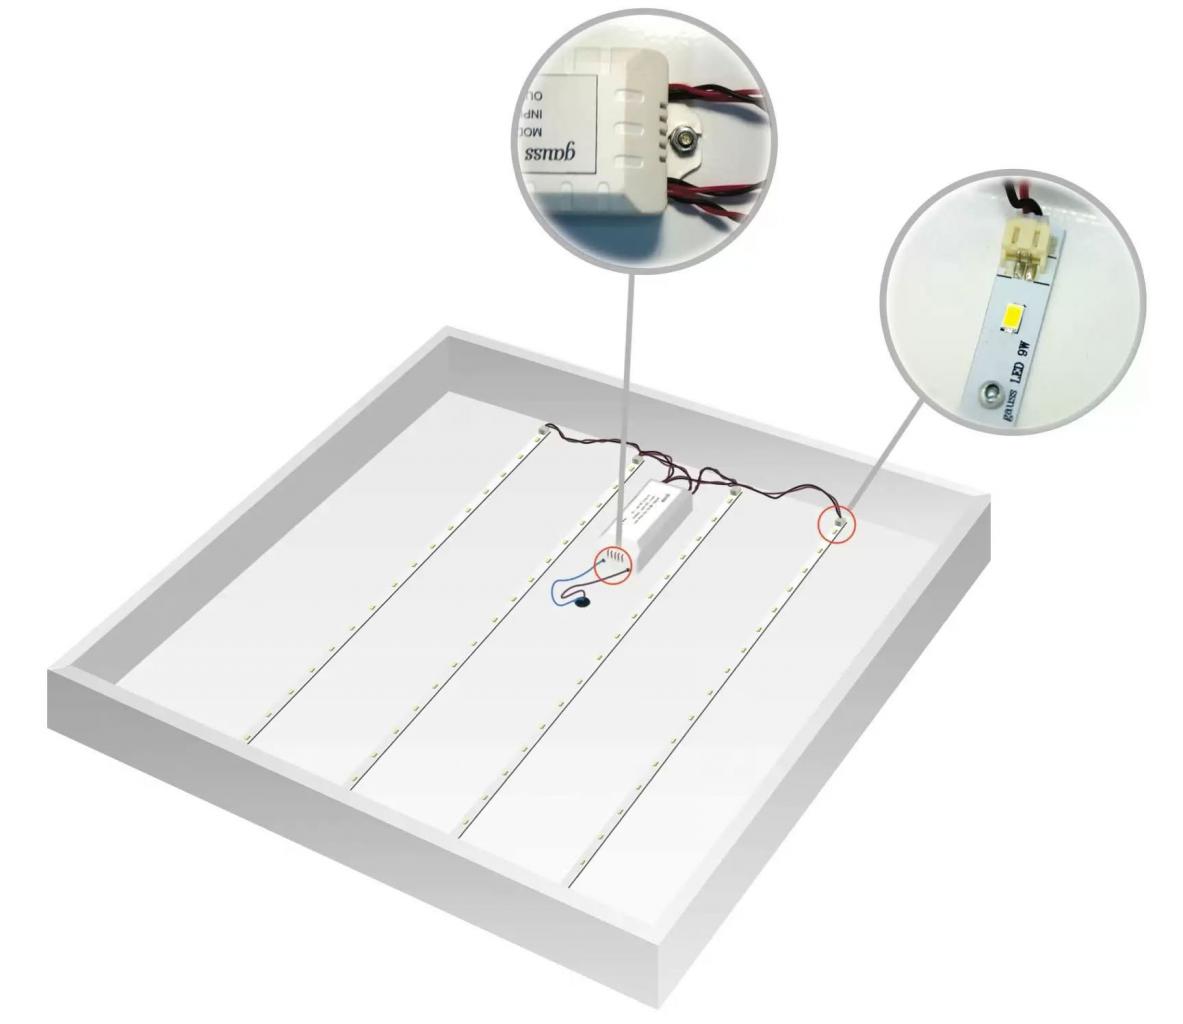
Armstrong lamp in its small housing carries advanced technology. CREE high-power LEDs are mounted on a thick aluminum plate to improve cooling and extend panel life. Lighting elements are attached to the lamp housing with rivets.
The body of the lamp is made of sheet steel, 40 mm thick, joined by welding to increase strength and durability. There are mounting holes for fixing the lamp and laying the power wire on it. It is painted white with powder paint. The diffuser plate is made of polycarbonate, and is attached to the housing using guides and a snap-in plug.
The diffuser owes its optical properties to high-quality material and a special structure. For the production of Armstrong lamps, a transparent polymer is used, which provides minimal obstacles to the light flux. The prismatic structure provides an even luminous flux, without glare and dazzling dots, which makes it a good choice for both office and residential premises.
Lamp advantages
Increased energy saving parameters make the described lamps a good alternative to traditional light sources. Due to the use of LEDs instead of fluorescent lamps, the lamp does not contain mercury. The service life is 50 thousand hours.
When using Armstrong devices, indoor lighting becomes more comfortable for the eyes. The reason for this is the high luminous, 3000 lumens, and neutral color flux.
Easy installation and a wide range of applications make it possible to install fixtures on any surface. It is worth noting the ease of installation on suspended ceilings.
LED mounting options
Armstrong LED lighting fixtures are appreciated for their ease of installation and wide application possibilities. Installation, for the most part, is not particularly difficult and can be done with your own hands.
Installation tools
A distinctive feature of this type of lighting device is that its installation does not require specific tools and skills.
If you need to make a built-in installation, you will need a jigsaw and special spacers. For surface mounting, it is advisable to use liquid nails, but you can do with thick double-sided tape.
Wires are used PVA or PVVSh. An additional junction box is required for each group of lighting fixtures.
Overhead mounting
For installation of Armstrong lamps, a standard ceiling with a 600X600 mm module is suitable. First you need to choose a place for the future location of the electric lamp and remove the panel from where the lighting device will be installed. Next, you need to bring the power wires to the installation site.
The order of installation of the lamp:
- Remove the diffuser panel.
- Connect the wires inside the housing of the LED lamp using the terminal block.
- Replace the diffuser panel.
- Install the lamp on the ceiling rails.
On this installation is completed. The light is ready for use.
When the Armstrong LED lamp is turned on in the network, it is necessary to connect a grounding wire to it regardless of the method and place of installation.
Surface mounting
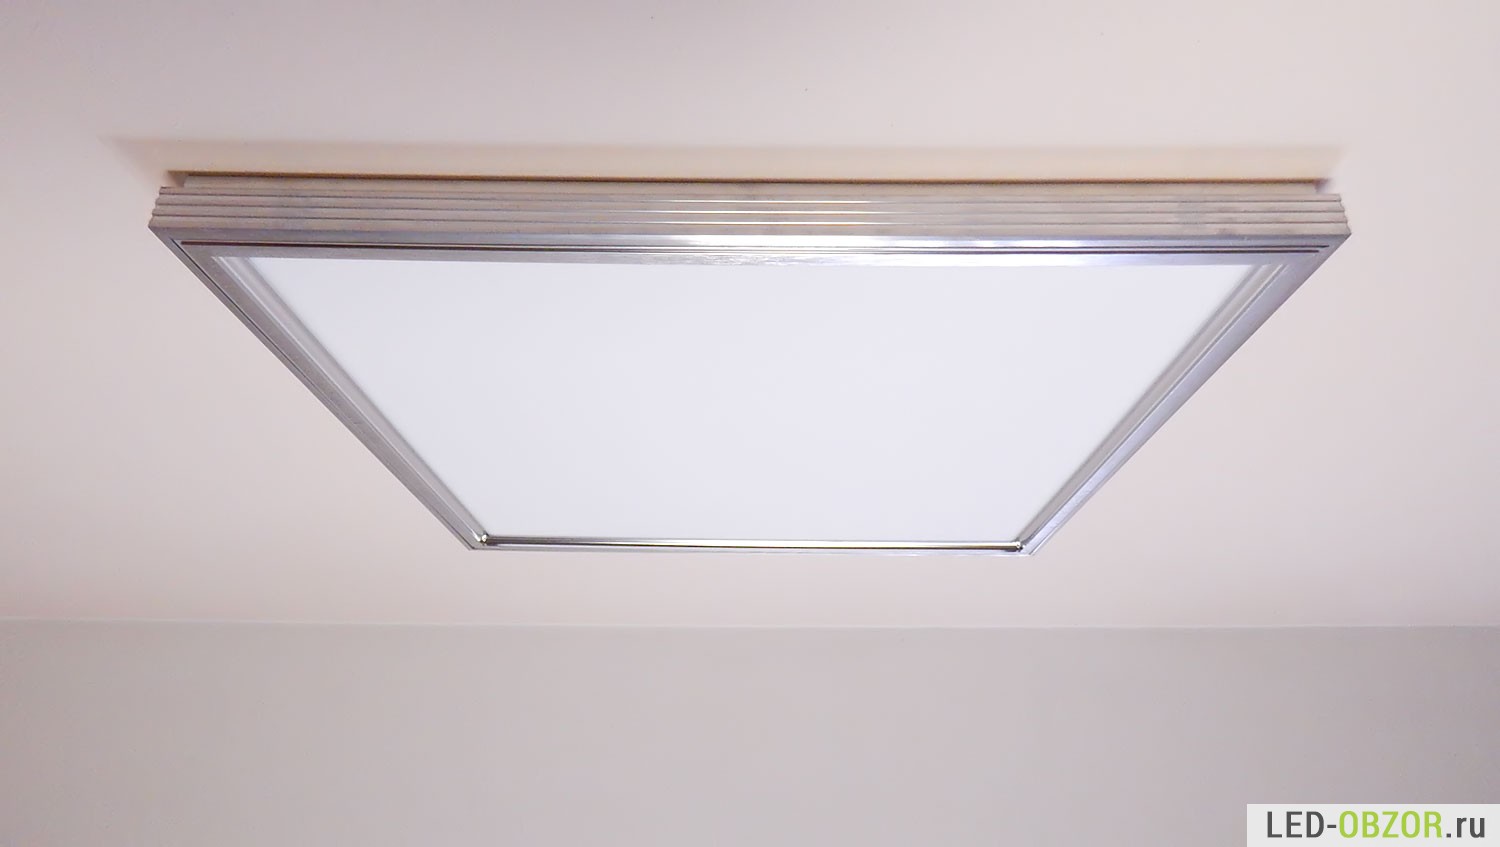
If necessary, the lamp can be placed on the surface of the ceiling. To do this, you must:
- Remove the light diffuser.
- Drill holes in the ceiling, in accordance with the fasteners on the lamp housing.
- Fix Armstrong lamps to the ceiling with dowels.
- Connect the power wires to the terminal block of the luminaire.
- Install the diffuser.
All manipulations must be carried out only with a de-energized network.
Recessed mounting
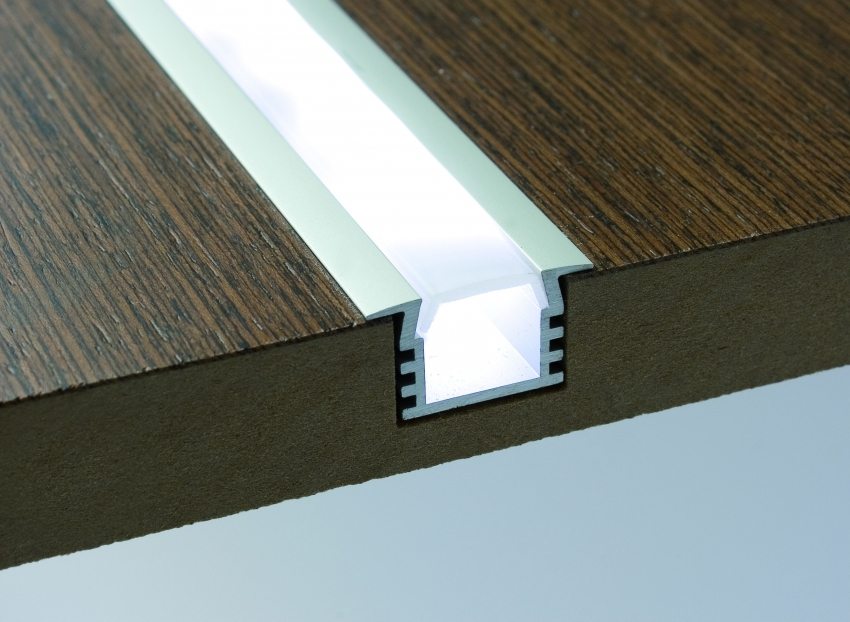
If necessary, add a point light source, you can install the recessed lamp. To do this, you must:
- Cut a hole in the panel according to the size of the lamp housing.
- Lead the power wires to the installation site.
- Install special struts on the lamp.
- Connect the light to the network using the terminal block.
Mounting a recessed luminaire requires more skills, as it is necessary to properly cut a hole in the decorative panel.
Installation without cover frame
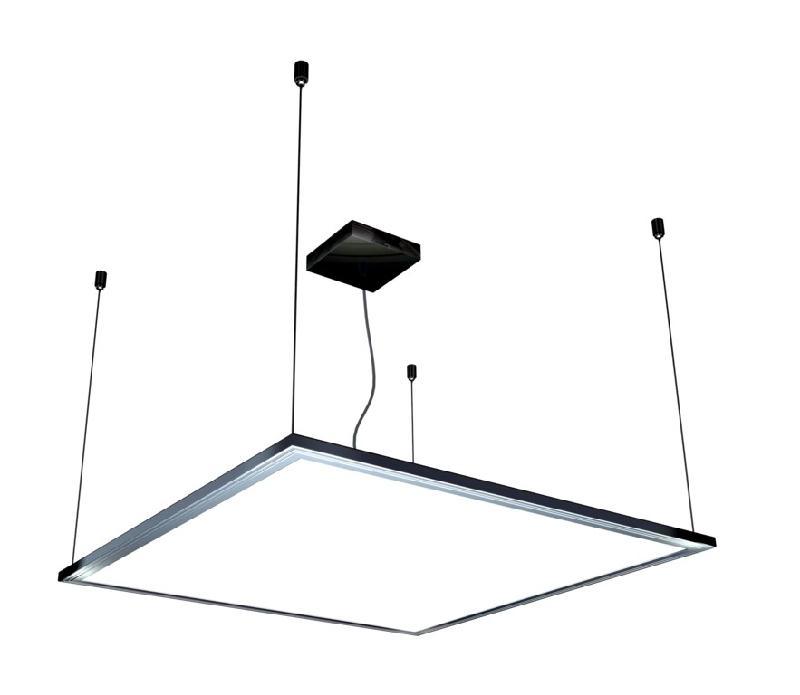
Installation can be done without using the additional accessories that come with the kit. For this, the Sibertek SL 6060 electric lamp is suitable. The only obstacle to the path will be the choice of the location for installing the power driver. But since it is absolutely optional to put it near the lamp, you can hide it in a junction box or behind drywall, after extending the supply wires.
Mounting to the ceiling can be arranged using double-sided tape or liquid nails. The second method is preferable, since the probability of a fall of the lighting device is minimized.
The order of installation of the lamp using liquid nails:
- Degrease or prime both surfaces.
- Apply liquid nails to the surface of the lamp housing with a “snake”.
- Firmly press the lamp to the ceiling and hold for 1-2 minutes.
- Connect the power wires.
Under no circumstances should you manipulate the electrical network without first disconnecting it.
Network Connection Rules
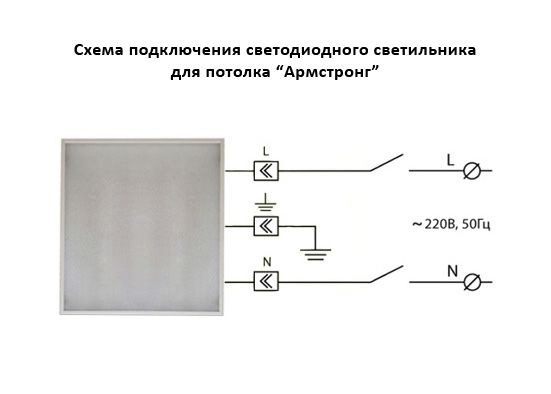 The connection scheme is used standard - 4 × 18.
Wires under the ceiling must be passed through the corrugated cable channel, avoiding sagging. Connecting fixtures in series is unacceptable. It is better to use separate junction boxes for each group of luminaires, from which to bring the supply wires to each luminaire individually.
Wiring: zero (blue) to N, phase (red or white) to L.
As a conductor, it is best to use the wires of PVA, or ball screw. The core must be crimped with a sleeve or tin to improve contact.
Lamp repair Armstrong
Repair is complicated by the fact that in Armstrong LED lamp the lamp cannot burn out. We need to look for the cause deeper. If you have the necessary knowledge, the repair will not provide difficulties.
The cause of the failure of the lighting device may be a malfunction of the power supply or the LED in one of the tapes.
If the driver fails, the first thing you should pay attention to is the fuse, varistor and filter capacitor at the input.
It is very easy to identify a fuse malfunction with a visual inspection. If the thread in the glass bulb is in a cliff - replacement is necessary.
If the varistor breaks down, a crack and burnout form on its body. The capacitor swells or bursts and fills the board with electrolyte. Both of these malfunctions can be easily eliminated by replacing the burned components and cleaning the circuit board from soot or traces of electrolyte.
If the LED fails, it is necessary to identify the tape on which it burned out. You can identify a faulty diode during a visual inspection. A small black dot appears on it. After finding the culprit of the malfunction, the tape is sealed off, carefully removed from the aluminum substrate and replaced by a similar one.
If the visual inspection does not give results, then another node is faulty. In this case, it will not work to reanimate the lighting device itself. The rest of the repair of the Armstrong LED lamp can be done with your own hands.
Safety precautions
When working with the mains, it is necessary to make sure that there is no voltage, turn off the input circuit breaker and hang the poster “Do not turn it on!” People work! ” For greater security, you can disconnect the input wires from the switch.
When using stairs, building gantries and stepladders, you need a man on a safety net. Compliance with these rules will allow you to safely install the lamp.