LED strip is actively used in the illumination of apartments. It is installed on ceilings, walls, furniture. Using such a device is easy and convenient, in addition, the LEDs are safe and effective. For these and many other reasons, people began to switch to diode lighting. LED strip does not require special skills when connecting and installing, but still you need to know some features.
LED strip device
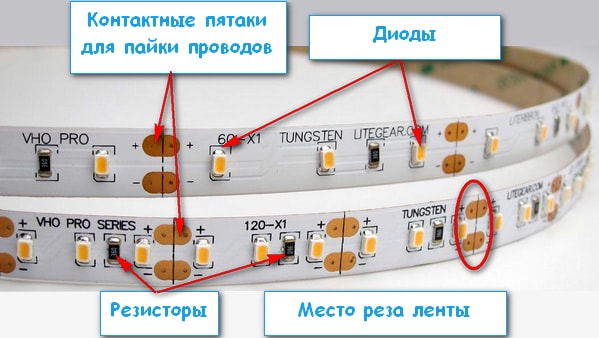
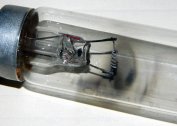
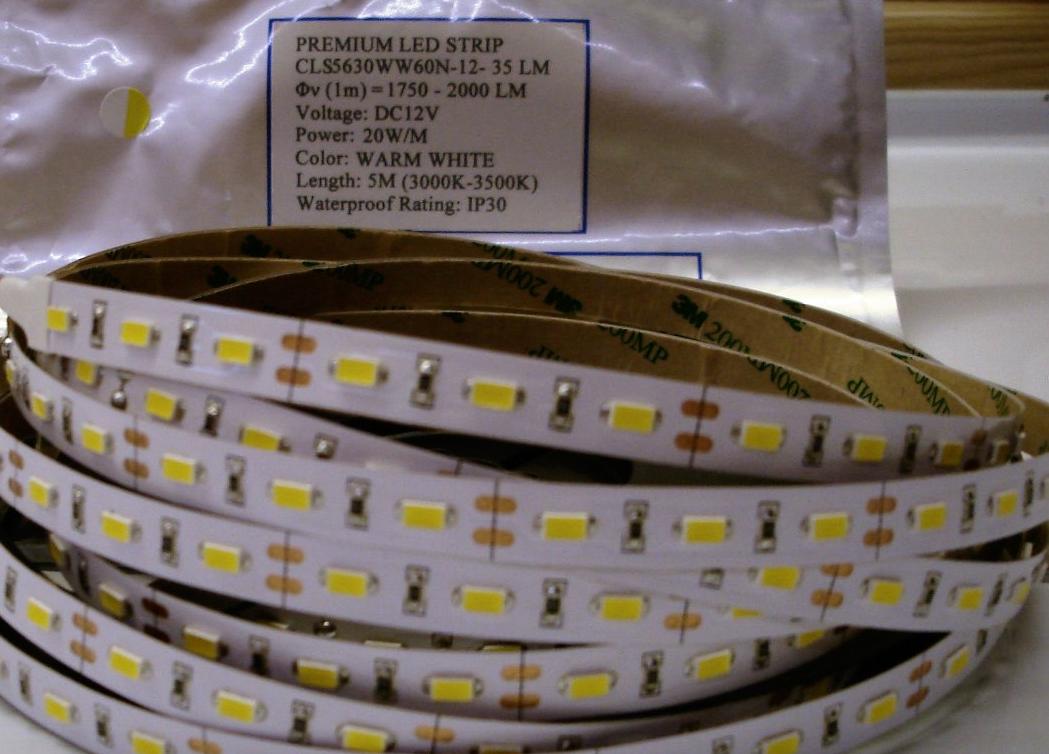
LED strip is also called duralight. It is a flexible printed circuit board on which LEDs and current-limiting resistors are applied. For ease of installation, there is an adhesive layer, with which you can install the tape on any flat surface, including in hard-to-reach places. You can turn it on, like a regular lamp.
The LEDs mounted on the board have different colors:
- white different color temperature;
- green;
- red;
- blue;
- yellow;
- multicolor.
Also, the tape has standard sizes - thickness 2-3 mm, width 8-10 mm. The length varies, but usually lighting devices are sold in reels of 5 meters.
Criterias of choice
Before buying a tape, you need to determine the requirements in advance. They will depend on the installation location, climatic conditions, tasks. You should also decide on the budget that the buyer is willing to spend on the purchase of the lamp.
The main characteristics of the tape:
- The brightness of the glow.
- Type (monochrome, multicolor).
- Modes of operation.
- The number of LEDs per meter.
- LED quality, type of crystal used.

- Dip or smd diodes. Surface mounted LEDs are cheaper.
- Self-adhesive or not base.
- Degree of protection against dust and moisture IP.
- Resistance to aggressive environmental influences.

When choosing, you need to decide in advance whether the tape will have additional illumination or if it needs more brightness.
LED Strip Benefits
Lighting devices made of LEDs are distinguished by their positive qualities in comparison with classic light sources. Because of this, there is a transition to more profitable lamps.
The main advantages of duralight:
- Low power consumption.
- Duration of work. They can serve from 5 to 13 years, subject to the correct operating conditions.
- Laying along any trajectory is provided due to the flexibility of the board.
- Possibilities of cutting the tape into smaller segments.
- High efficiency.
- Lack of heating.
- Quick turn on.
- There is no flicker that negatively affects health. Ripples are noted only in low-quality cheap products of unknown production.
 It is possible to use small pieces of tape
 - Resistance to network surges.
- The absence of ultraviolet radiation.
- A wide selection of colors.
- Fire safety.
- Environmental friendliness.
- Easy styling.
- Manufacturer's Warranty.
The disadvantage of LED products is the rather high cost of one product. But due to small expenditures on energy, it quickly pays off.
Installation Rules
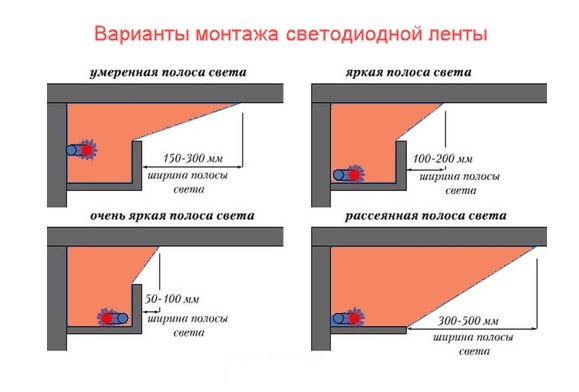 The duration of the duralight directly depends on the observance of the operating conditions and the correct installation. The most advantageous places for installing the lighting tape are the following places in the premises:
- Niches of walls and ceiling. Then the tape fits into a special box.
- The surface of the walls and ceilings inside the corners of plastic.
- Behind the skirting boards on the ceiling.
In all these cases, the general installation requirements are the same.
- Connection is made only through the converter - a power supply that reduces the voltage to working 12 or 24 V. Directly connect the duralight to a voltage source of 220 volts in the socket is prohibited.
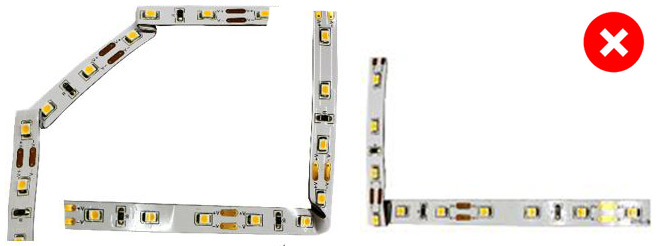
 Do not bend the LED tape
 - Tapes are fixed and connected using specially selected connectors and connectors. Soldering is also possible.
- Do not bend the duralight and allow mechanical stress.
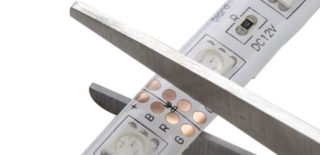
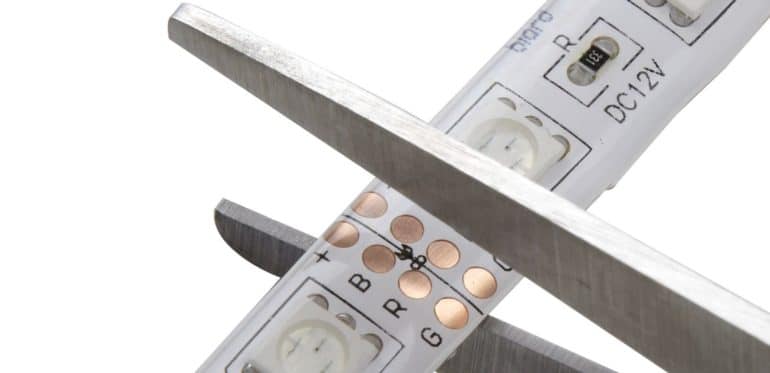
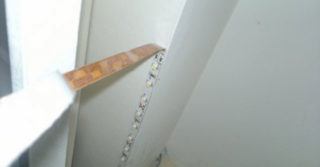
- You can cut the board only in specially marked places so as not to damage the conductive paths. Otherwise, duralight will not function. Similarly, you cannot damage the tracks if you want to connect the segments.
- Be sure to pay attention to the IP protection class. For use in water, IP66 tapes are suitable, if it turns on outdoors, the class must be IP55.
- Fasten the tape only on a smooth and clean surface. Then the board will not be damaged and dirty.
 The adhesive surface of the tape is not intended for repeated use.
 - The glue surface allows you to fix duralight only once. Therefore, it is recommended to pre-select and come up with a lighting system so as not to waste money and not spoil the lamp. You can draw a trajectory on the surface with a pencil to glue the device on it.
- If a tape length of more than 4A is used, it is better to connect the parts by soldering. This is more reliable than using connectors.
- In series, it is recommended to connect no more than 5 meters of tape. Otherwise, the brightness of the LEDs will be lower, system overload will occur.
- The power of the transformer - power supply must be higher than the total load by 20-30%.

It is recommended to use the help of specialists when connecting the power. If the system is installed independently, it is imperative to observe safety precautions. Also, do not work with defective tape. In this case, it must be replaced under warranty.
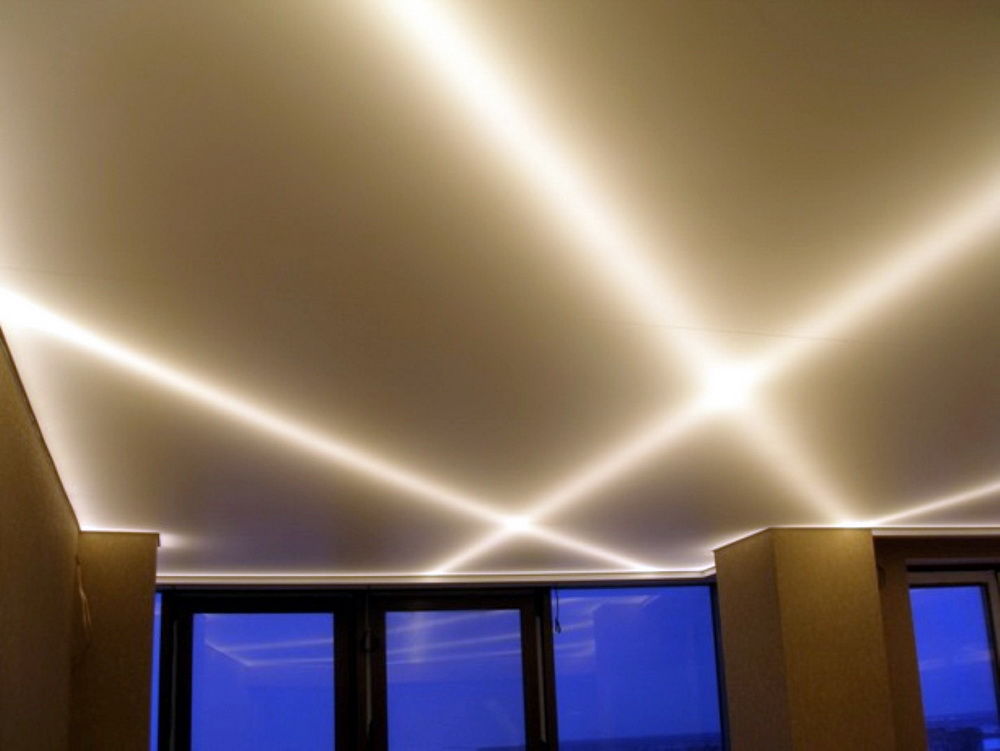
Design guidelines
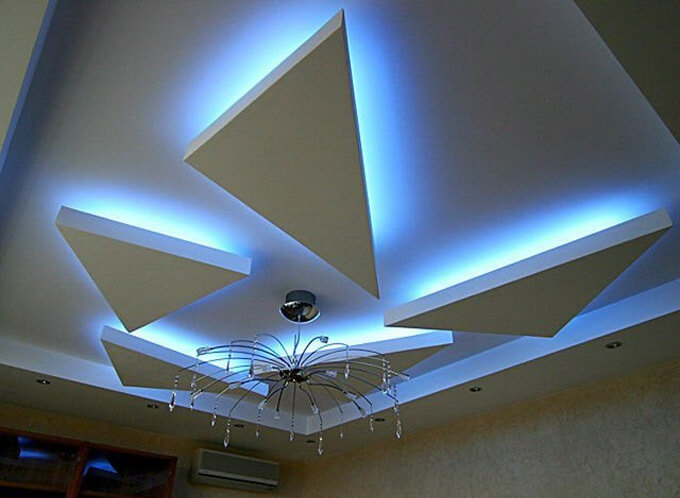
Duralight performs not only the function of backlighting, but also decorative. You can get a winning interior performance if you follow the advice of specialists. Using the tape, you can achieve different effects - for example, zoning a kitchen room or visually increasing ceilings.
If you plan to create a multi-level system, the distance between the levels should be 20 cm. Otherwise, there is a risk of uneven distribution of light. The optimal depth is 2-3 cm.
If the house uses hinged glossy ceilings, then it is better to refuse lighting. Diodes on such a surface will be reflected as in a mirror.
When creating the layout of the fixtures, it is important not to forget about the convenience of access to them. If repairs are required, the master should easily get to the broken part.
Mounting Methods and Installation
There are various ways to mount the tape on the ceiling.
- Installation in the plinth. This method has the most important advantage - the master will not need to redo the ceiling. The skirting board is mounted at a distance of 8-10 cm from the ceiling. You can glue the duralight on the skirting board itself after installing it. The tape is glued to a special adhesive base.
- Installation in a cornice made of drywall. This method is more complicated, but it looks visually spectacular.
Step-by-step installation instructions for duralight on the ceiling:
- Determination of the length of the tape, its characteristics. Buying a suitable profile.
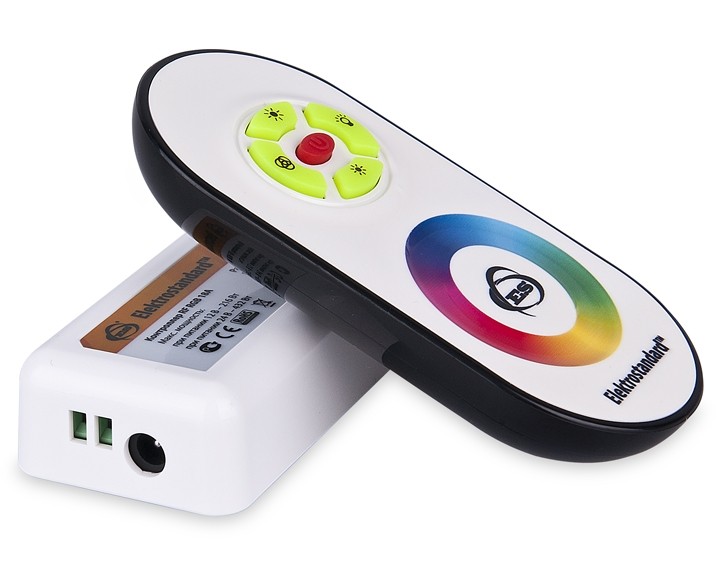
- Buying a controller to control the backlight and brightness of the glow. Adjustment is made using the remote control.
 Controller for LED strip RF RGB 18A touch
 - The acquisition of special connectors. They depend on the type of duralight and the manufacturer. Vary in shape.
- The choice of power supply.
- Assembly of the system with successive laying and gluing of LED thread.
- Connection to the power unit.
The power supply is an essential part of the system. The choice depends on a number of characteristics that must first be dealt with.
Power supply selection
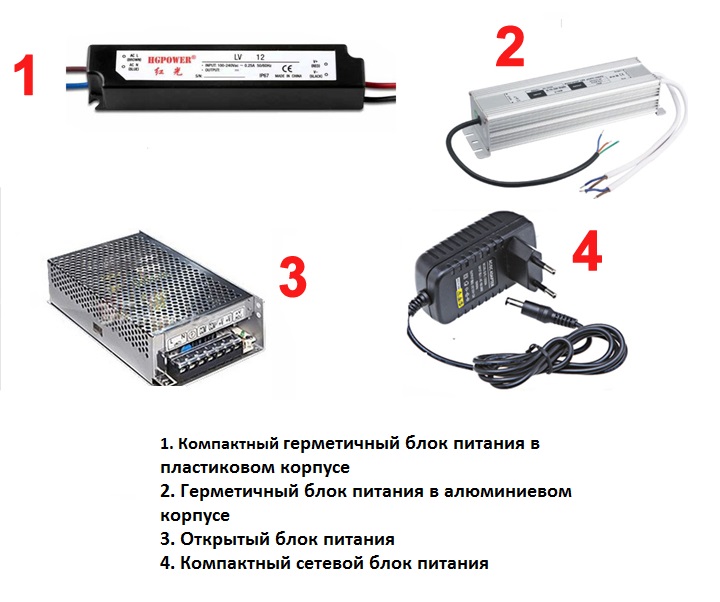
Power supplies vary in power - there are products from 6 to 400 watts. It is selected depending on the full load of the tape, taking into account a margin of 20-30%.
An example of power calculation is as follows. There is a tape 5 m long and 9.4 W power, for which a power supply is selected. The total load of the tape is 5 * 9.4 = 47 watts. The power supply should have a power of 47 * 1.25 = 58.75 watts with a power reserve of 25%. The resulting value can be rounded up to 60 W - it is at this value that the unit that should power the LED strip is selected. Wrong choice threatens the lack of system performance.
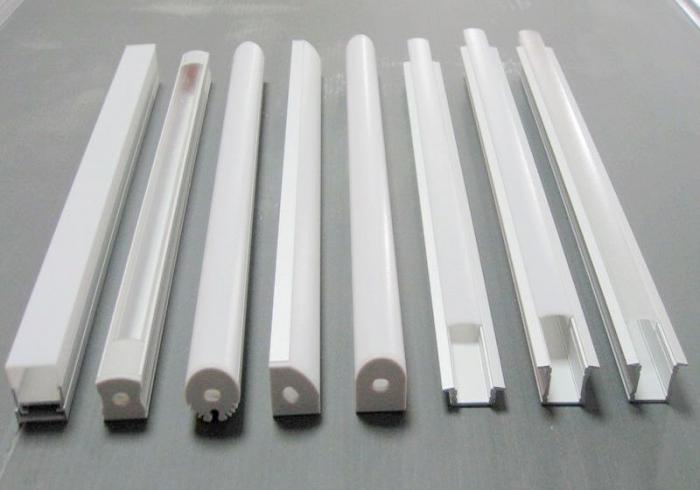
Profile selection for installation
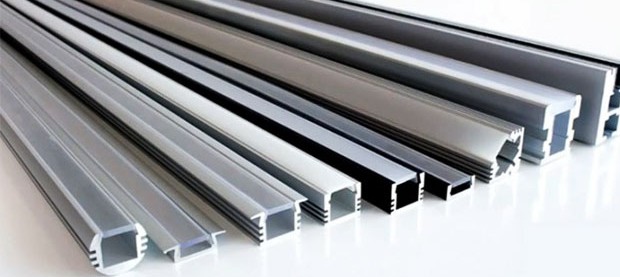
Mounting profiles vary in material and device. Usually they are made of the following materials:
- Aluminum. It is a reliable and versatile system that fits any interior. Used for quick and easy implementation of the lighting system. They dissipate heat well.
- Plastic. The plastic box is made of high-quality and reliable material, which is resistant to temperature surges, increased moisture, mechanical stress. It is matte and transparent. It is used in public buildings, shop window lighting, furniture lighting and commercial equipment.
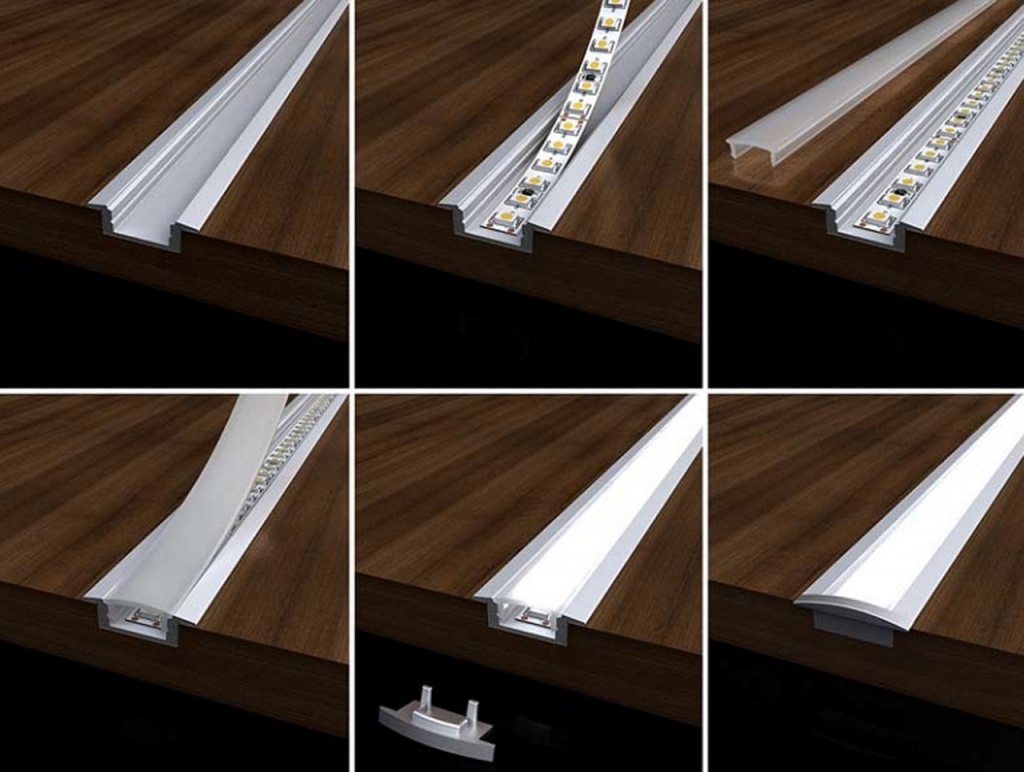
The device distinguishes between profiles:
- Corner Apply when a standard profile is inappropriate. Examples of use - window dressing, trading floors, cabinets, instead of ceiling skirting. Using this profile, you can independently come up with original layouts of LED threads.
- Recessed. This model looks like a regular metal profile. It is quite voluminous and has several advantages. These include resistance to aggressive environmental influences, reliability, and fastening strength. It is recommended to mount the system on specialized glue or fastening. Then the design will be of high quality and reliable.
- Mortise. These types of profiles are installed to highlight various furniture - for example, kitchen sets, beds, cabinets. The color of the profile is usually gold and silver. Length - 1-2 meters. To ensure that the light is scattered, an opaque light filter can be installed. This allows you to make a more attractive appearance of furniture.
The profile performs not only the role of the laying box, but also the function of heat dissipation. Therefore, you cannot buy cheap plastic products that are unstable to tape heating.
Stretch ceiling connection diagram
First of all, the length of the thread is determined. The required size can be obtained by splicing several ribbons according to special marks. The entire developed system is assembled on the floor, after which the quality of contacts and stability are checked.
If a color RGB tape is used, the connection to the controller is carried out in accordance with the marking. For a single-color ribbon, marking is not necessary. The controller must be connected to the power supply also observing the markings. Here you can not confuse the wires, otherwise the duralight will burn out. The last step is to connect the switch.
The assembled structure is connected to the network and checked. After that, it can be attached to the ceiling. Then, the operability is checked again on the ceiling, after which the canvas is completely assembled.
Installation and Connection Recommendations
Before gluing the LED strip, prepare the surface for installation in advance.It must be degreased with alcohol, and then wiped with a dry, clean cloth.
Products with a power of more than 10 W / m are mounted in metal and aluminum profiles. Plastic is not able to give optimal heat dissipation. An aluminum backing can also be used.
If duralight is mounted on conductive surfaces, insulate the tape. To do this, it can be placed in the frame.
During assembly, the integrity of the conductive tracks must not be impaired. Otherwise, the tape will not work.
Longer lengths are recommended to be connected in parallel. With a serial connection, overload will occur, burnout of conductive tracks.