The electrical wiring in the house must be safe in any room, even with special climatic conditions. The bathroom has a difficult microclimate, dangerous for wiring - high humidity, water splashes and high temperatures impose special conditions on the equipment. There is a special waterproof automation and accessories that can work in any conditions. Correct installation and the selection of the best tools will ensure the safety of electrical wiring in the bathroom.
Requirements prescribed in official documents
The main rules for wiring to the bathroom are prescribed in GOST R 50581.7.701-2013. The document is called “low-voltage electrical installations. Part 7-701. ". From it, a number of basic requirements that you need to know during installation can be distinguished.
First of all, the master must understand that in the bathroom, the space is divided into electrical safety zones. There are 4 of them:
- 0 - places where the water is located. This bath, sink, shower and other sources of fluid.
- 1 - zone around 0. These include walls next to the bathtub, sink and other sources of water.
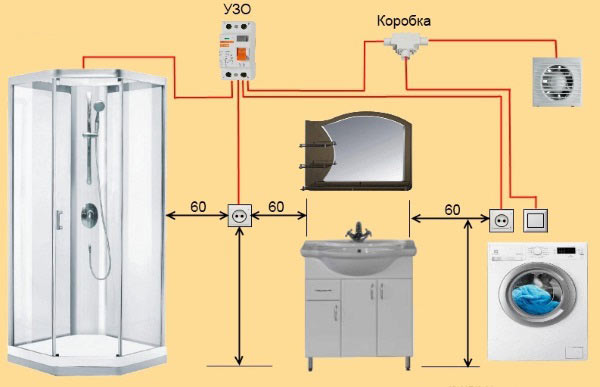
- 2 - at a distance of 60 cm from the edge of the bathroom.
- 3 - conditionally safe zone outside the previous three.

There are also requirements of the PUE, according to which:
- Valid open and hidden wiring. The cable insulation must withstand temperatures from 170 ° C.
- In zones from 0 to 3, equipment with a different IPxx protection class is installed. You can choose the appropriate one according to special tables. For 0 zone IPx7, for 1 IPx5, for 2 IPx4, for 3 IPx1. Moreover, only in the third zone is it permissible to install control devices, junction boxes and distribution devices.
- Prohibition of the installation of sockets in showers. They can be installed only in zone 3, while the outlet must be connected through a distribution transformer or protected by an RCD.
Not in all versions of the PUE zone 3 is indicated. This is due to its conditional safety and standard rules for installation and installation.
Requirements for sockets, lighting group and switches
Switches, sockets and lighting devices are also subject to certain requirements.
- The maximum voltage of the fixtures in the shower or bath should not exceed 12 V. It is recommended to use such devices with ultra-low voltage for added safety.
- The protection class of sockets and switches must not be lower than IPx4.
- Enclosures of electrical appliances, risers, bathtub, grounding bus should be combined into a common potential leveling system.
- The bathroom is powered through a separate machine or RCD.
- Wires are laid in a corrugated pipe.
- Sockets and dimmers are placed no closer than 0.7 m from the bathroom, pipes, sinks and at a height not lower than 0.9 m from the floor.
The installation rules PUE does not impose special requirements. It is important that the selected electrician in the bathroom is suitable for working in difficult conditions.
For safety, modern leakage protection can be installed. The device module is connected via a separate cable and reliably protects the owner of the house and neighbors from flooding.
Tool preparation

For work, professional equipment with well-insulated handles is required:
- drill, hammer drill or chamfer;
- indicator or multimeter;
- screwdrivers;
- roulette;
- pencil;
- building level;
- knife or tool for stripping insulation;
- pliers;
- insulating tape.
If there is no drill or wall chaser in the home arsenal of tools, you can use a chisel and hammer to do the job manually.
Step-by-step installation instructions
Installation of electrical wiring in the bathroom can be carried out with the knowledge, skills and abilities in the field of electrical engineering. It can be done independently, if a person is confident in their abilities, or turn to professionals. If the connection is incorrect, there is a risk of electric shock, fire, or other negative consequences that could cause significant damage to health.
The connection algorithm consists of several steps. The wiring diagram in the combined bathroom will not differ much.
Choosing a wiring diagram in the bathroom
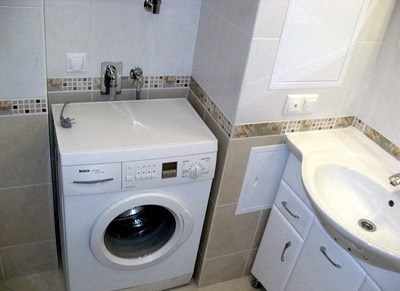
It is necessary to take into account the type of devices used, the method of lighting, heating systems. It is recommended to place the junction box outside the room. If the bathroom has a boiler, washing machine, electric boiler, at least 3 outlets are installed throughout the area. The switch is also recommended to be taken outside the room. All wires are laid in the wall under the ceiling at a right angle.
Before wiring in the bathroom, you should disconnect the room.
Material selection

The components that are optimal in terms of technical characteristics are selected. It is advisable to take a three-core cable with a cross section of 2.5 sq. Mm for outlets and 1.5 sq. Mm for a lighting group. For powerful equipment, a thicker copper wire is selected. The cable to the wall is attached to the dowel clamps.
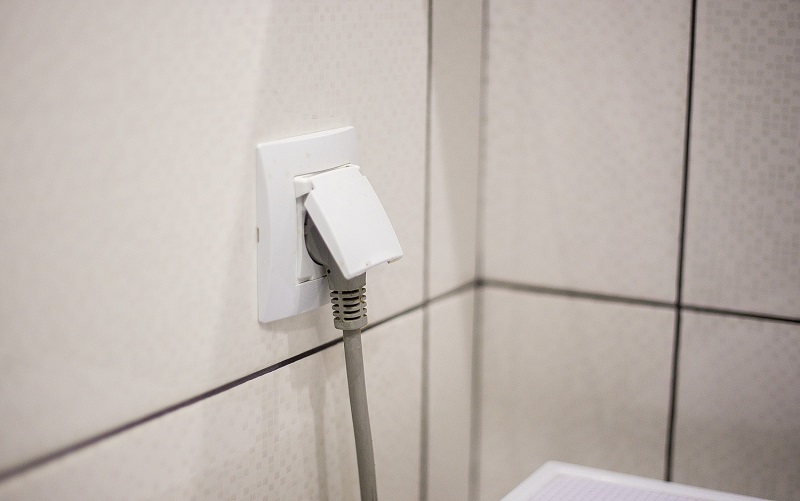
Sockets and switches must be protected against splashes (special cover), with a degree of IP44 and higher, as well as the presence of a grounding contact. Moisture-proof fixtures are better to take point on 12 V.
To equalize the potentials, a power PV-3.1. * 6 wire is selected and, optionally, lugs.
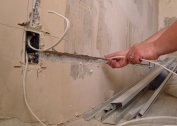
Installation work
According to the developed scheme, gates are made in the panel house and recesses for sockets, junction boxes and switches. Then put the socket and box. The gates are fixed wiring. Wires connect to outlets. Then put the cores in the socket and places for the switches. The protective panel of the power outlet is installed after checking the wiring. After fixing the wiring on the wall, the automatic machines and RCD are connected.
The final step is to check the wiring in the bathroom. To do this, use a multimeter to ring the line for a short circuit. In its absence, you can install decorative covers on sockets and engage in finishing work and repair.
Creating a potential equalization system

After installing the wiring in the bathroom and toilet, you should create a potential equalization system. To do this, you need a single-core cable made of copper, which will connect to each other a washing machine, risers, sinks, bathtubs, boilers and other electrical appliances. All points are connected to the ground bus in the shield.
Security
According to modern standards and norms, the wiring must contain 3 cores - phase, zero and ground. In old houses, the grounding cable may not be available, so you should update the wiring in the entire apartment.
Protection is also provided by RCDs - residual current devices. They cut off the power supply in an emergency. The installation of such devices should be done by a professional, since the life and health of people directly depends on the correct installation.
Together with the RCD, circuit breakers are also installed that interrupt the current supply during overloads and short circuits. Automata for 10 A are placed on the lighting, on powerful devices - up to 25 A. Automata, like RCDs, are mounted in the distribution panel.All tenants of the apartment must learn to use these devices in order to save life and property in case of emergency.