When the socket becomes unusable or you need to put it in a new place, you need to drill a recess for the socket. A box for installing sockets and switches for concealed wiring allows you to securely fasten the mechanism and safely "hide" deep. It is important to install such protection in houses made of wood - a local fire protection is created during a circuit or malfunction.
Design features
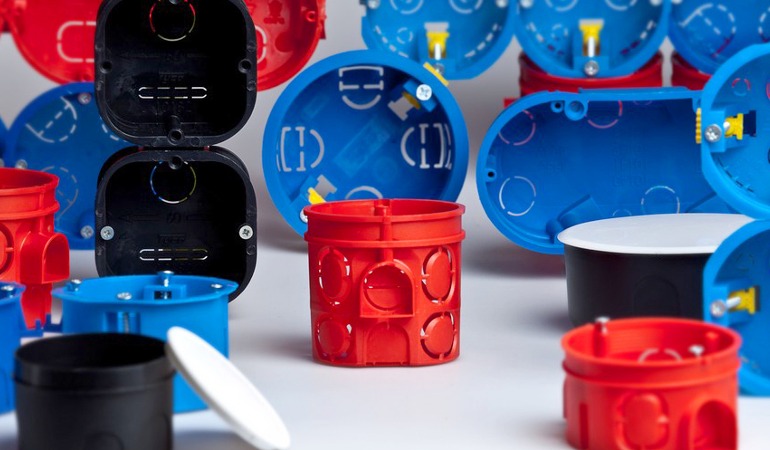
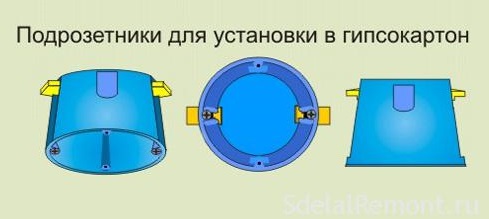
A box for electrical outlets is called a “glass” due to its characteristic shape. Products are made for different purposes, devices and walls, so they have several design options. For example, if you want to install a power point or a switch in a gypsum wall, use a glass with “paws” that are pressed to the surface.
Plastic and metal are used as the material; they do not differ in shape and appearance, but the latter are more durable and durable. Installation in aerated concrete, brick, foam blocks and concrete is allowed. Simple items are secured inside the pocket with divorced alabaster.
The sockets are distinguished by the installation method:
- overhead - suitable for outlets near baseboards or other protruding elements;
- hidden - classic boxes of the body socket (with "ears" and without them).
The external shape can be round, square, oval, rectangular. Most often use the first. If you need to accommodate a large mechanism or a lot of wires, a square product is suitable. Oval is placed if it is necessary to place two devices nearby, for example, a socket and a switch.
The depth of the products, depending on the type of mechanism, choose the classic option, in-depth or narrow. In some cases, non-standard socket boxes are used as a frame for a junction box.
Product Sizes
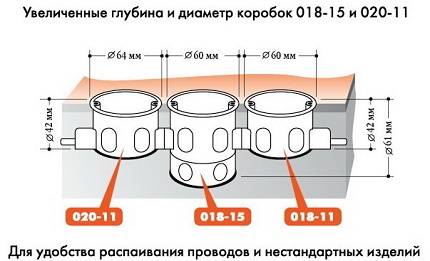
The dimensions of the boxes vary and depend on the manufacturers and destination. Glasses with a diameter of 4.5 cm and a depth of 6.8 cm are common, given the walls of the product inside, 6.5 cm by 4 cm are obtained. Narrow models have a depth of 2.5 cm and deep ones - 6.5 and more. Such standards are used by the company IEK - high-quality and common electrical products.
There are no standards for square and oval sockets. The most common sizes are 7.0x7.0 cm, 6.0x6.0 cm. Therefore, when buying, it is advised to take spare ones. If one type of equipment is used during the repair, the result is safer and more thoughtful.
Choosing a box for sockets and switches
 Before buying glasses, it is necessary to determine the characteristics of the walls into which the installation will be made, the size of the outlet. For example, for drywall on the rosette there should be fixing "ears" or clamps. There are no such requirements for other materials - any options will do.
Electricians advise purchasing sockets and boxes at the same time, so that you can immediately compare the dimensions and technical compatibility of products.
Drywall Installation
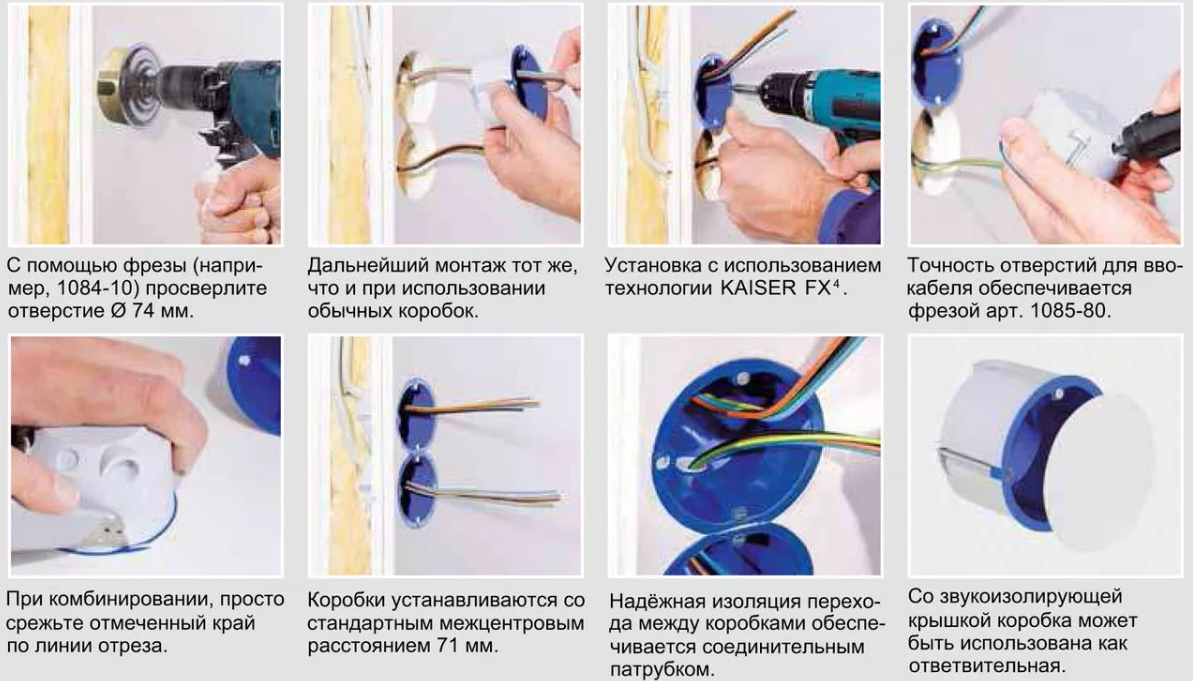
Drywall walls and partitions are increasingly being used for repairs. Lightweight, comfortable material has its own characteristics. Therefore, to install access points to the electricity network, it is necessary to take special boxes that are installed under sockets in drywall. To select a place, use the standard rules and requirements (GOSTs) - the absence in the immediate vicinity of sources of heat, humidity, height suitable for users.
Before direct installation, marking is performed in accordance with a pre-prepared plan. The hole for the box for sockets and switches can be cut with a hacksaw, a strong knife. Difficulties arise with the eruption of round recesses - to make fairly smooth edges use an electric saw with a round nozzle (milling cutter).
The box for sockets is installed inside the slot, fixed with screws. The optimal distance between the centers of neighboring undergrowths is considered to be 7.1 cm for classic glasses.
A feature of the installation is the need for additional thickening of a piece of the wall where the device will be located. Usually use a small layer of the material from which the walls.
Drywall is fragile and thin enough, if the place of the outlet is not strengthened, there is a high probability of damage. For example, a tight-fitting fork will pull the entire mechanism.
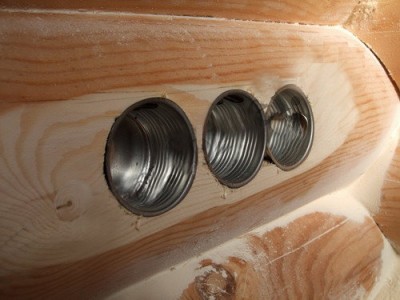
Installation in a wooden wall
First of all, the installation of the box for sockets and switches depends on the type of wiring in the house: open - outside, on top of the walls; hidden - in the recesses after gating. The latter is a costly and time-consuming method, rarely used: in addition to financial costs, an accurate calculation of the wiring plan is required, professional electricians - errors are unacceptable.
For wooden walls, you can not use plastic boxes for sockets - only metal. In some cases, let’s say a special non-combustible plastic (found infrequently, expensive). The socket plays a protective role if a short circuit occurs, sparks, ignition.
Installation work does not differ from installation in walls made of other materials. For the hole, take a separate crown for the tree. It has a different structure, type of tie-in. Fix the installation box for hidden wiring with screws. Alabaster or other mixtures are not required.
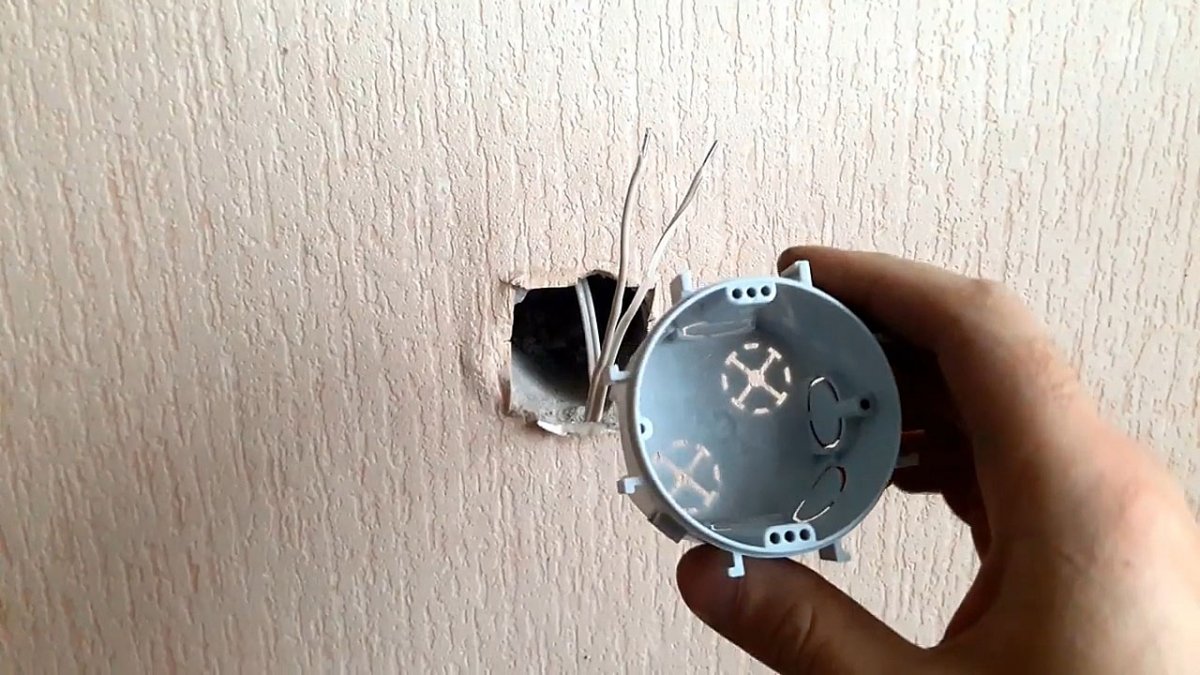
Installing a new outlet box in place of the old
Most of the buildings were built in Soviet times. Wiring standards were different, devices too. Soviet boxes for switches and sockets are larger than modern ones, fasten poorly and move inside - paws and ears do not fix properly.
The order of work
When working with old boxes for installing outlets, you should adhere to the general rules and principles of working with electrical networks: blackouts, the use of rubber gloves and the like. Work Stages:
- Disconnect power to the area by turning off the machines on the house shield.
- Check the actual power supply - try turning on the lamp or other device.
- Remove obsolete or broken outlet: cover is removed, fasteners are untwisted.
- Separate the terminals from the “unnecessary” outlet.
- Assess the appearance and tightness of the socket box.
- If the glass is in order, the new mechanism is fixed on self-tapping screws for stability.
- If the box is in a malfunctioning state, remove, secure a new one.
When working with nails and self-tapping screws, you must carefully monitor the wires so as not to touch or damage. Electricians advise to blunt sharp ends or shorten.
Cup assembly
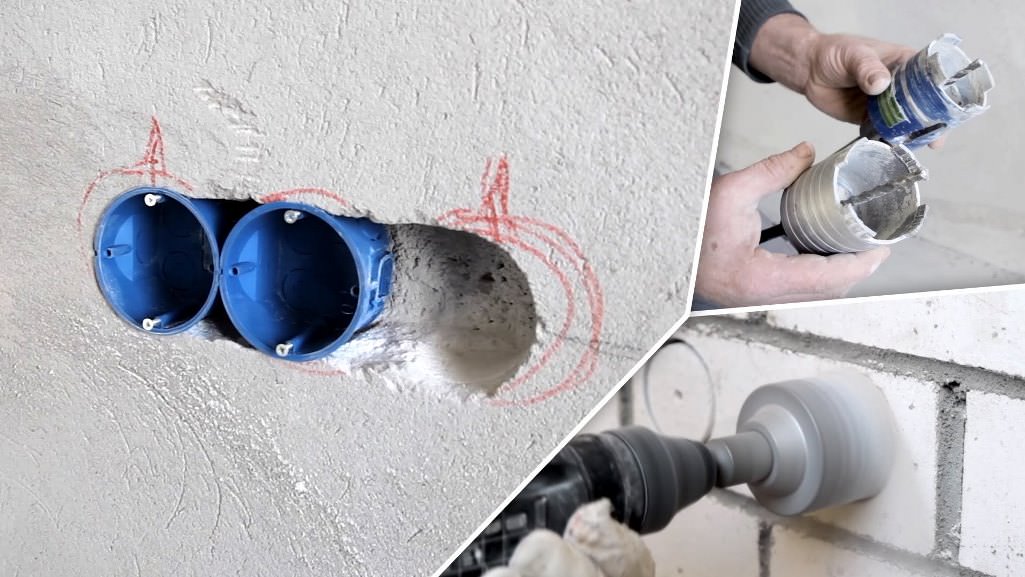
To install several socket boxes nearby (block), it is necessary to use special marking and a drill with a nozzle with a diameter of 8 cm. The protruding ends of the wires are de-energized, assembled into a bundle (twisted, fixed with wire), bent to the left. Marking is applied to the right - more often they use a simple pencil. It is important to consider the location - cables should be routed into the box from an angle in a diagonal direction.
There are two types of blocks:
- Ready - bought assembled, boxes for switches and sockets have the exact dimensions for marking.
- Stacked - is prepared from several separate sockets, requires accurate calculation of the distance between the centers of the glasses. A drawing with dimensions is prepared in advance, and a level is used for marking.
The block of sockets and switches should be precisely aligned - the length of the product will show even a slight deviation, it will be difficult to correct the situation. For classic boxes, the optimum center distance is 71 mm. For individual sizes, preliminary calculations and a plan are required.
Drills with a nozzle suitable for the wall material create holes of suitable depth. Partitions between them are hollowed out (for example, with a chisel). Trying on the wires. If everything is correct, proceed to direct installation and connection.
Installing a cup for an outlet or switch is easy. It is important to consider the type of wall material, thickness, size of devices and their compatibility. When working with non-standard walls - tiles, tiles, similar - additionally calculate the depth minus the thickness of the top coating. If you take into account the nuances, study the descriptions and requirements, timely de-energize the work areas, you can not worry about security and install boxes in any quantities.